Hook: Want fresher air inside your car without spending hours or dollars at the shop? A simple cabin air filter DIY project can be completed in under 10 minutes, improving airflow and reducing allergens. Follow this how to change cabin filter tutorial to keep your HVAC system running smoothly as part of your quick car maintenance routine.
- Discover why replacing your cabin air filter matters for health and performance
- Follow our streamlined, step-by-step guide to swap filters in minutes
- Learn pro tips to extend filter life and common mistakes to avoid
Why Cabin Air-Filter Replacement Matters
Your cabin air filter is the first line of defense against dust, pollen, and road debris entering your vehicle’s interior. Over time, a clogged filter restricts airflow, forces your HVAC system to work harder, and can even cause unpleasant odors. Regular cabin air filter DIY not only improves air quality for you and your passengers but also enhances heating and cooling efficiency—saving you money on fuel and reducing wear on blower motors.
Step-by-Step Guide: DIY Cabin Air-Filter Swap
1. Locate the Filter Housing
Most cabin air filters are housed behind the glove box or under the dash. Open the glove box, remove any contents, and gently unhook the dampening arm. Squeeze the glove box sides inward to release the stops and lower it fully. You’ll now see the rectangular filter cover.
2. Remove the Old Filter
Use a flat-head screwdriver or your fingers to unclip the filter cover. Slide out the dirty filter, taking note of the airflow arrow printed on its frame. Inspect the old filter: if it’s dark, crusty, or loaded with debris, it’s definitely due for replacement.
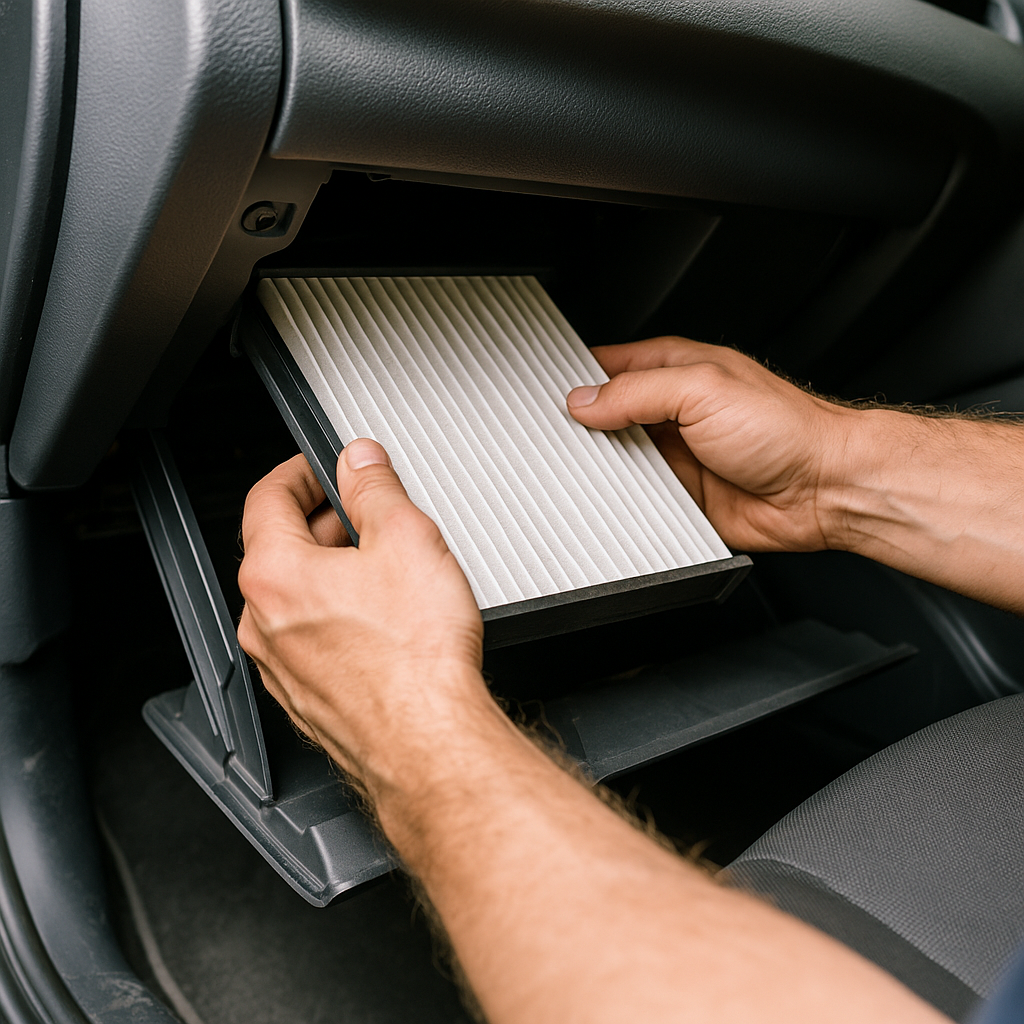
3. Install the New Cabin Air Filter
Grab your replacement filter and align it so the airflow arrow matches the direction indicated on the housing. Gently slide it into place, ensuring the edges seat flush against the frame. Avoid forcing the filter, which can damage the pleats or housing.
4. Reassemble and Test
Snap the filter cover back into its clips, lift the glove box back into position, and reattach the dampening arm. Close the glove box, start your engine, and run the blower on high to confirm strong, unobstructed airflow. Congratulations—you’ve completed a quick car maintenance task in record time!
Pro Tips & Advanced Tricks
- Choose a high-quality HEPA-style filter for superior particle capture
- Keep a spare filter in your glove box to swap out seasonally or after dusty trips
- Use a handheld vacuum to clean the housing before installing the new filter
- Mark your dashboard or maintenance app with the date and mileage for your next swap
Common Pitfalls to Avoid
- Wrong filter orientation – Installing with the arrow facing inward can reduce airflow and stress the blower motor.
- Neglecting the housing seal – Ensure the cover clips fully engage to prevent unfiltered air bypass.
- Skipping pre-clean – Debris left in the housing can damage the new filter or lead to rattles.
FAQs
- Q1: How often should I change my cabin air filter?
- A1: Most manufacturers recommend replacing every 12,000–15,000 miles or at least once per year, but check your owner’s manual for specific how to change cabin filter intervals.
- Q2: Can I perform this swap outdoors?
- A2: Yes—just park on level ground, keep your doors closed to minimize dust, and follow the same steps for a smooth cabin air filter DIY experience.
- Q3: What are the signs of a clogged cabin filter?
- A3: Reduced airflow, musty or stale odors, increased dust inside the cabin, and louder blower noise all indicate it’s time for a swap.
Conclusion & Next Steps
Performing a cabin air filter DIY in under 10 minutes is an easy way to enhance air quality and maintain your car’s HVAC efficiency. Add this simple task to your biannual maintenance checklist and enjoy cleaner, fresher interior air year-round. If you found this guide helpful, share it with fellow drivers or leave your own quick car maintenance tips in the comments!