Hook: Dreaming of showroom shine without the shop price? Mastering car detailing at home is easier than you think—with the right detailing tools and a systematic approach, your ride can look better than new. Follow this DIY auto detailing guide to transform your car in a single weekend.
- Essential tools and supplies for every budget
- Step-by-step detailing process from wash to protect
- Pro tips to elevate your finish and avoid common mistakes
Why Home Detailing Matters
Regular professional detailing can cost $150–$300 per session. Investing in car detailing at home not only saves money but also lets you control products and techniques. You maintain paint gloss, protect against UV damage, preserve interior materials, and boost resale value—all at a fraction of the cost.
Must-Have Detailing Tools & Supplies
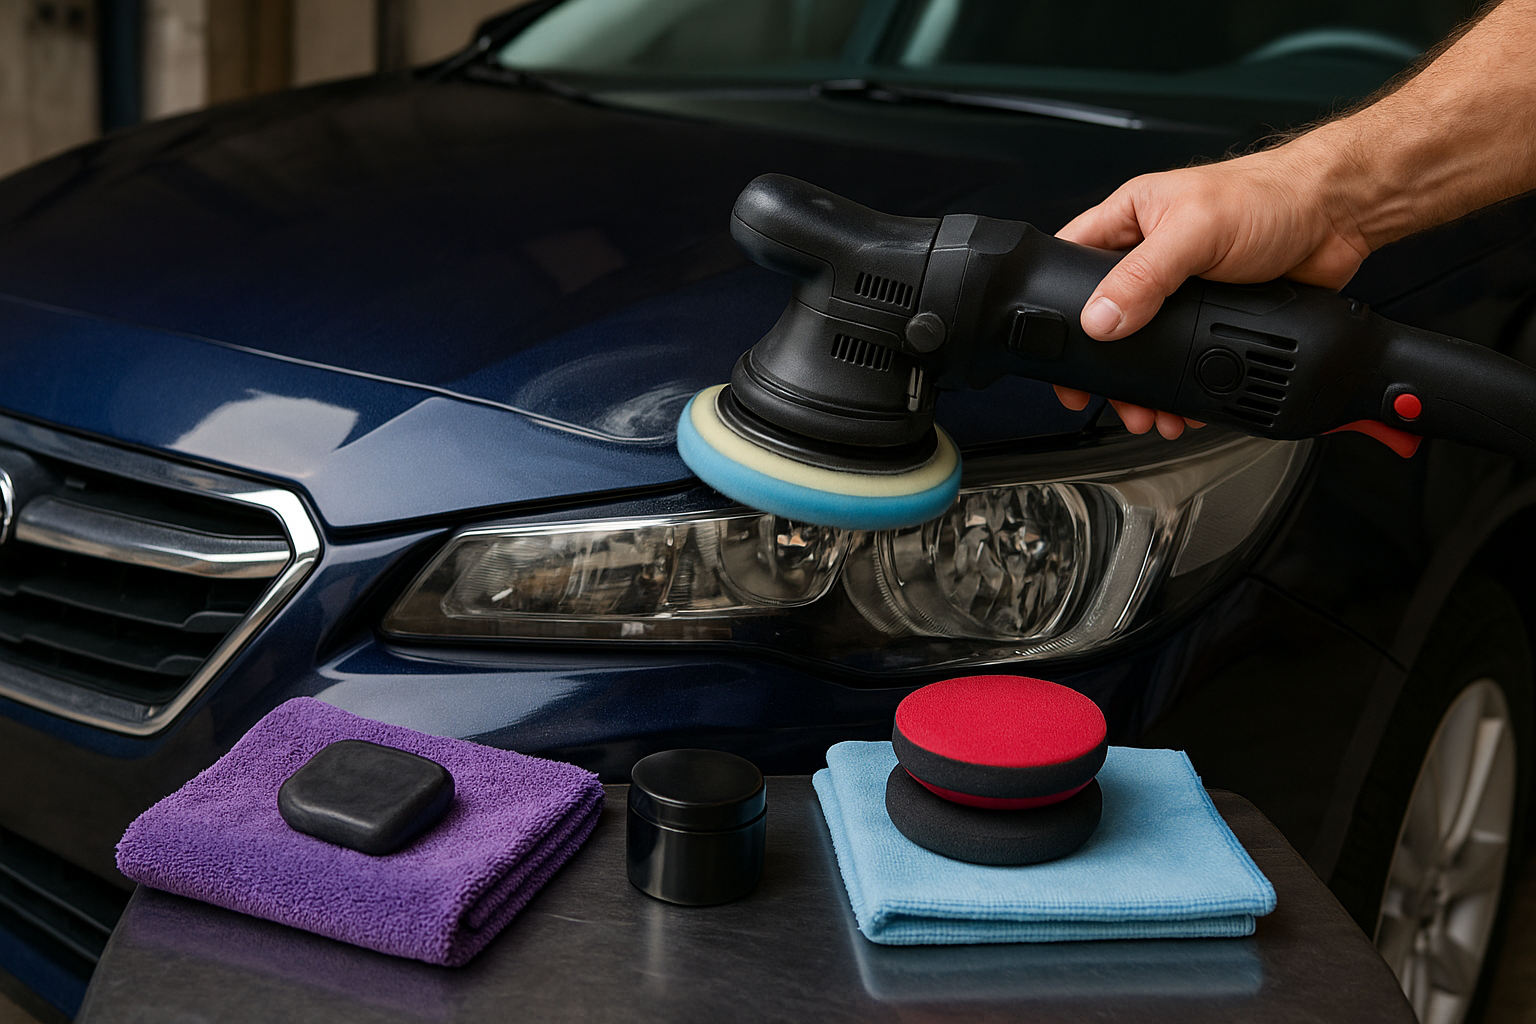
- Dual-action polisher: Reduces swirl marks and speeds up polishing.
- Microfiber wash mitts & towels: Gentle on paint and lint-free.
- Foam cannon or spray bottle: For pre-soak and snow-foam wash.
- Clay bar kit: Removes embedded contaminants from paint.
- Compound, polish & wax or sealant: Three stages for depth and protection.
- Interior brush set: Soft-bristle brushes for vents, seams, and crevices.
- All-purpose cleaner (APC): Degreases wheels, door jambs, and engine bay.
- Glass cleaner & applicators: Streak-free windows and mirrors.
Step-by-Step DIY Auto Detailing Process
1. Pre-Wash & Wheel Cleaning
Rinse the entire car with a pressure washer or hose. Apply snow foam via foam cannon or spray bottle—let it dwell for 5–7 minutes. Use an APC and wheel brush to remove brake dust, then rinse thoroughly.
2. Two-Bucket Wash
Fill two buckets—one with soapy water, one with clean rinse water. Use a microfiber mitt to wash panels from the top down, rinsing the mitt in the clean bucket after each panel to minimize swirl risk.
3. Decontamination (Claying)
Spray a clay lubricant, knead the clay bar until pliable, and glide over paint to lift bonded contaminants. Wipe with a microfiber towel before moving to polishing.
4. Paint Correction & Protection
Apply compound with a dual-action polisher to remove light scratches and oxidation. Follow with a fine polish for gloss, then spread wax or paint sealant for long-lasting protection. Buff off residues with a clean microfiber towel.
5. Trim, Glass & Interior
Dress exterior plastics and tires with a dedicated trim restorer. Clean glass inside and out with streak-free glass cleaner. Inside, vacuum carpets and seats, use APC on vinyl and plastics, and brush crevices. Finish leather surfaces with a conditioner.
Pro Tips & Advanced Tricks
- Work in shade and on a cool surface to prevent products from drying too quickly.
- Use color-coded microfiber towels to avoid cross-contamination (e.g., red for wheels, blue for paint).
- Mask off plastic trim and badges before polishing to prevent compound buildup.
- Finish with a quick detailer spray between washes to maintain gloss and hydrophobic effect.
- Invest in quality polish pads—foam pads for cutting, microfiber pads for polishing.
Common Pitfalls to Avoid
- Using dish soap for wash: Strips wax and degrades clear coat—always use pH-balanced car shampoo.
- Skipping clay bar: Polishing over contaminants can leave swirl marks and dull the paint.
- Overloading the polisher: Too much compound creates haze; apply in thin layers and buff thoroughly.
- Neglecting wheel arches & jambs: Dirt buildup corrodes metal—clean these areas regularly.
FAQs
- Q1: How often should I detail my car at home?
- A1: Aim for a full DIY detail every 3–4 months; maintain with wash and quick detail spray every 2–4 weeks.
- Q2: Can I skip polishing and just wax?
- A2: Wax bonds to existing clear coat. If your paint is dull or has light scratches, polishing first ensures the best shine and protection.
- Q3: Is a dual-action polisher necessary?
- A3: It’s highly recommended—DA polishers are safer than rotary machines for beginners and deliver professional results with less risk of clear coat damage.
Conclusion & Next Steps
By following this DIY auto detailing process and investing once in key detailing tools, you’ll achieve professional-grade gloss and protection on your own schedule. Start with a basic kit and build your collection over time—your car (and wallet) will thank you. Ready to shine? Gather your tools, clear your weekend, and get detailing!