Blog

  • How Credit Scores Impact Auto Insurance and Loans Together

    How Credit Scores Impact Auto Insurance and Loans Together

    Hook: Did you know your credit score not only influences your credit score car loan rate but also the price you pay for credit impact auto insurance? Lenders and insurers both view credit history as a gauge of risk—understanding how can help you secure better financing and lower premiums.

    • Why credit scores matter to both lenders and insurers
    • Rate brackets for loans and insurance by credit tier
    • Actionable steps to boost your score and save money

    Why Lenders and Insurers Use Credit Scores

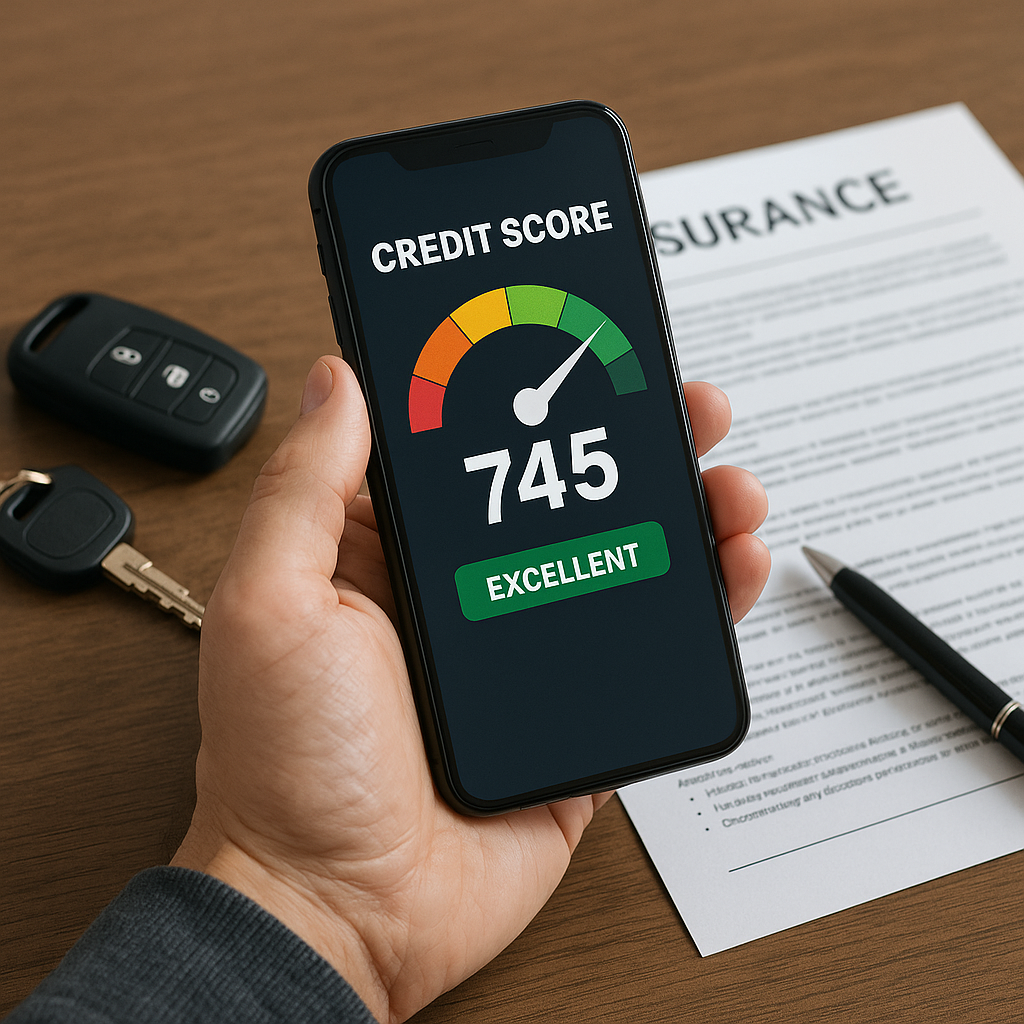
    Financial institutions analyze credit scores to predict future behavior. A high score signals on‑time payments and responsible borrowing, while a low score raises red flags. Auto lenders use your FICO score to set your loan’s APR—higher scores yield lower rates. Auto insurers increasingly factor credit-based insurance scores into premium calculations, rewarding financially disciplined drivers with discounts.

    Loan Rates by Credit Tier

    According to recent data, average new‑car loan APRs vary significantly by score:

    • Excellent (750+): 3.5%–4.5% APR
    • Good (700–749): 5.0%–6.5% APR
    • Fair (650–699): 7.0%–9.0% APR
    • Poor (<650): 10.0%–15.0% APR or higher

    A 5% APR vs. 12% APR on a $30,000 loan over five years means an extra $5,000 in interest. That’s why improving your score before applying can yield substantial savings.

    Auto Insurance Premiums by Credit-Based Scores

    While regulations vary by state, many insurers use a proprietary credit‑based insurance score (CBIS) to set rates. On average:

    • Top CBIS Tier: 10%–20% cheaper premiums
    • Middle Tier: Standard market rates
    • Bottom Tier: 20%–50% higher premiums

    For example, a policy costing $1,200/year for top‑tier drivers could exceed $1,800/year for those in the lowest tier—another clear incentive to maintain healthy credit.

    Steps to Improve Your Score & Lower Costs

    1. Pay On Time, Every Time: Payment history makes up 35% of your FICO score. Automate bills to avoid late marks.
    2. Reduce Credit Card Balances: Lower your utilization ratio (credit used vs. credit available) below 30%.
    3. Avoid New Hard Inquiries: Multiple loan or card applications in a short span can ding your score.
    4. Keep Old Accounts Open: A longer average account age bolsters your score—don’t close long‑standing cards prematurely.
    5. Dispute Errors Promptly: Review your report annually and correct inaccuracies that can drag your score down.

    Combining Tactics for Maximum Impact

    Timing is key. Aim to improve your score at least 60 days before loan or policy applications. Secure pre‑approval on auto financing to lock in rates, then quote insurance using your updated score. In many cases, bundling auto and home policies at a single insurer who rewards strong credit can multiply your savings.

    Common Pitfalls to Avoid

    1. Focusing Only on Score Number: Also monitor score factors—reducing balances and cleaning errors delivers results faster than chasing arbitrary point goals.
    2. Missing Soft Pull Options: Some lenders and insurers offer “soft” quotes that don’t impact your credit—use these to shop around before committing.
    3. Overleveraging Credit: Don’t open multiple credit lines at once; each hard inquiry can cost 5–10 points temporarily.

    FAQs

    Q1: Do all states allow credit‑based insurance scores?
    A1: No—states like California, Massachusetts, and Hawaii prohibit or limit the use of CBIS. Check your state’s regulations before shopping.
    Q2: How long after improving my credit will rates drop?
    A2: Lenders and insurers typically refresh data monthly. Expect visible rate improvements within one to two billing cycles after credit changes post to your report.
    Q3: Can a recent car loan inquiry affect my insurance rate?
    A3: Hard auto loan inquiries count toward your credit score but usually have minimal impact on insurance scores, which focus more on payment history and utilization.

    Conclusion & Next Steps

    Your credit score car loan terms and credit impact auto insurance premiums are two sides of the same coin. By proactively improving and managing your credit, you position yourself for lower rates across both arenas. Start with a free credit report review, implement the score‑boosting steps above, and shop multiple lenders and insurers once your credit reflects your best self. With strategy and patience, you can drive and insure your next vehicle at optimal rates.

  • Electric Hot Rods: The Rise of Retro-EV Conversions

    Electric Hot Rods: The Rise of Retro-EV Conversions

    Hook: Imagine the growl of a classic hot rod replaced by a whisper‑quiet electric motor. The burgeoning movement of retro‑EV conversions is rewriting iconic cars history and redefining what cars that changed automotive industry can look—and drive—like. Here’s how builders are marrying vintage style with cutting‑edge electrification.

    • The origins of the EV conversion craze in classic‑car circles
    • Key technical challenges: battery placement, packaging, and weight distribution
    • Standout builds and future trends in retro‑EV culture

    The Roots of the Retro‑EV Movement

    While OEM electric vehicles have boomed over the past decade, visionaries in the custom‑car community saw an opportunity to breathe new life into classic chassis. Early adopters began back in the late 2000s, swapping aging V8 powerplants for salvaged electric‑vehicle drivetrains from the first-generation Nissan Leaf or Chevy Volt. Enthusiast forums and maker fairs quickly spread the idea: what if your 1965 Mustang could sprint to 60 mph silently and with zero emissions?

    Technical Hurdles & Solutions

    1. Battery Placement & Packaging

    One of the biggest challenges is finding space for a battery pack without sacrificing trunk volume or chopping the original body. Many shops custom‑fabricate battery trays that sit within the frame rails or replace the gas tank with a slim module. High‑energy‑density lithium‑ion cells can sometimes be housed under the rear seat or beneath the floorpan, keeping the car’s center of gravity low.

    2. Weight Distribution & Suspension Tuning

    Adding hundreds of pounds of batteries can upset a classic chassis’s balance. Builders often upgrade springs, shocks, and anti‑roll bars to compensate. In high‑end conversions, adjustable coilovers and corner‑balancing allow the car to retain its handling character, ensuring a tight hot‑rod feel—only now with instant torque.

    3. Integrating Controls & Instrumentation

    Marrying analog gauges with digital EV systems demands creativity. Some builders retrofit classic dials to read battery state‑of‑charge, motor temperature, and kilowatt output. Others install a minimalist touchscreen that blends seamlessly into the dash, preserving period style while providing real‑time EV data.

    Standout Retro‑EV Builds

    • The “E‑Vintage Chevy”: A ’57 Bel Air powered by dual Tesla Model S drive units, punching out over 600 hp and 800 lb‑ft of torque. Its custom‑built battery pack fits neatly where the rear seat once lived.
    • Model A “Electron Rod”: This Ford Model A roadster uses repurposed BMW i3 batteries under the hood and a small induction motor behind the firewall. It keeps its original three‑speed, now acting as a gear reduction.
    • VW Beetle EV Revival: By swapping in a Renault Zoe motor and battery pack, builders have created Beetles that maintain the classic silhouette but deliver brisk acceleration and regenerative braking.

    Why Retro‑EVs Matter

    These conversions symbolize a crossroads of preservation and progress. They keep beloved classics on the road without the maintenance headaches of carburetors and oil changes. By eliminating tailpipe emissions, they allow owners to drive heritage vehicles in low‑emission zones that would otherwise ban older cars.

    Pro Tips for Aspiring Builders

    • Start with a solid chassis: Rust‑free frames simplify battery installation and ensure safety.
    • Select a donor EV wisely: Vehicles with compact, high‑energy battery packs (e.g., Leaf, i3, Bolt) reduce weight and complexity.
    • Work with experienced shops: Custom fabrication, electrical safety, and code compliance are critical—partner with pros who specialize in EV systems.
    • Plan for charging: Consider onboard chargers and DC fast‑charge compatibility to make your retro‑EV practical for daily use.

    Common Pitfalls to Avoid

    1. Under‑spec’d wiring: Using stock automotive wire can overheat—always up‑rate wiring and fuses for high‑current EV use.
    2. Poor thermal management: Batteries and motors need cooling—neglecting temperature control can shorten component life.
    3. Ignoring safety standards: Proper insulation, grounding, and crash protection for battery packs are non‑negotiable.

    FAQs

    Q1: How much does a retro‑EV conversion cost?
    A1: Prices range from $30,000 for basic driveshaft swaps with salvaged parts to over $100,000 for turnkey, high‑performance builds with custom batteries.
    Q2: Will my classic’s registration or insurance change?
    A2: Many jurisdictions allow conversions under “alternative fuel” or “electric” classifications; check local DMV rules. Specialized insurers offer coverage tailored to EV conversions.
    Q3: Do retro‑EVs still require maintenance?
    A3: Yes—suspension, brakes, tires, and cooling systems still need service. But you eliminate oil changes, tune‑ups, and exhaust repairs.

    Conclusion & Next Steps

    By blending iconic cars history with future‑proof electrification, retro‑EV conversions are reshaping the narrative of automotive preservation. Whether you’re a hot‑rodder, collector, or EV enthusiast, these builds prove that classic design and clean‑tech performance can coexist. Ready to join the revolution? Start researching your dream conversion, find the right donor EV, and help write the next chapter in cars that changed automotive industry.

  • Behind the Badge: The Untold Story of the Porsche Crest

    Behind the Badge: The Untold Story of the Porsche Crest

    Hook: Few automotive symbols command instant recognition like the Porsche crest. From its 1952 debut to today’s global icon, the emblem encapsulates hunting traditions, regional pride, and racing heritage. Dive into this porsche logo history to uncover the fascinating brand story automobile that transformed a simple badge into a legend.

    • Origins in Stuttgart’s coat of arms and Württemberg tribal symbols
    • Key design changes from the original 1952 crest to modern variants
    • Hidden meanings behind every shape, color, and horse

    Origins: From City Emblem to Racing Identity

    The Porsche family chose Stuttgart—home of their factory—as the centerpiece of their new logo. Stuttgart’s name derives from “Stutengarten,” meaning mare’s garden. Incorporating the city’s black prancing horse on a yellow field paid homage to the region’s stud farms. Surrounding the horse, the red-and-black stripes and antlers from the Württemberg state crest reinforced Porsche’s deep German roots.

    Design Evolution: 1952 to Present

    Ferry Porsche and lawyer Ernst Fuhrmann commissioned graphic artist Franz Xaver Reimspieß in 1952 to craft a unique badge for the first 356 roadsters. Early prints revealed slightly different antler shapes and thinner strokes. By the 1960s, the lines were bolder, colors more vivid, and proportions refined. In 2008, Porsche refreshed the crest with high-gloss enamel, three-dimensional embossing, and polished metal to meet luxury branding standards while retaining the original motif.

    Symbolism Breakdown: Every Detail Matters

    • Prancing Horse: Strength and agility; nod to Stuttgart’s stud farm heritage.
    • Black & Red Stripes: Unity and energy; borrowed from the former Free People’s State of Württemberg flag.
    • Antlers: Territorial emblem; represent the old Württemberg-Hohenzollern coat of arms.
    • Gold Background: Prestige and excellence; underscores Porsche’s premium positioning.
    • “Porsche” & “Stuttgart” Lettering: Bold sans-serif type signals modernity and forward motion.

    Brand Story Automobile: Building a Racing Legacy

    From Le Mans victories in the 1950s to the modern 911’s endurance exploits, the Porsche crest has adorned some of the most successful race cars in history. Each triumph reinforced the emblem’s power: pit crews now wore patches featuring the crest, and fans sported lapel pins and jackets celebrating Porsche’s motorsport pedigree. This racing success propelled the badge from a factory marker to a global emblem of performance.

    Modern Adaptations & Merchandise

    Today, Porsche extends its crest beyond vehicles. Luxury goods—from watches and luggage to driver’s jackets—bear stylized versions of the badge. Limited‑edition collectibles often feature anniversary inscriptions layered over the traditional design. Through careful licensing, Porsche ensures every application maintains strict color, dimension, and material standards, preserving the integrity of its porsche logo history.

    FAQs

    Q1: Why does the crest feature antlers?
    A1: The antlers come from the old Kingdom of Württemberg’s coat of arms, symbolizing the region’s historical lineage and authority.
    Q2: Has the Porsche logo ever been drastically redesigned?
    A2: While minor tweaks to color contrast and embossing depth have occurred, the core elements—horse, stripes, antlers—have remained unchanged since 1952.
    Q3: What does the gold background represent?
    A3: Gold signifies quality, luxury, and excellence—attributes Porsche wanted to convey from the very beginning.

    Conclusion & Next Steps

    The Porsche crest is more than an emblem—it’s a distillation of regional heritage, engineering excellence, and racing glory. Understanding this rich brand story automobile deepens appreciation for every Porsche on the road. Next time you spot that prancing horse, you’ll know the centuries‑old origins and meticulous design choices behind this enduring symbol.

  • Inside the JDM Scene: Why Japanese Classics Keep Soaring in Value

    Inside the JDM Scene: Why Japanese Classics Keep Soaring in Value

    Hook: From the golden era of ’80s turbocharged legends to modern restomods, JDM culture has captured hearts worldwide. But why are Japanese classic car values climbing at record rates? Discover the history, the hype, and the hard numbers behind this aftermarket phenomenon.

    • The evolution of Japanese performance cars from domestic market to global icons
    • Key factors driving vintage JDM values skyward
    • Tips for spotting future classics and protecting your investment

    The Roots of JDM Culture

    “JDM” stands for Japanese Domestic Market—the cars and parts originally sold only in Japan. In the 1970s and ’80s, models like the Datsun 240Z, Toyota Celica, and Nissan Skyline GT-R were tuned for home roads. Their robust engines, lightweight chassis, and cutting‑edge technology quickly gained underground fame abroad through importers, magazines, and motorsport victories.

    Iconic Models That Fueled the Craze

    Datsun 240Z (1969–1978)

    Affordable, sleek, and reliable, the 240Z ignited global interest in Japanese sports cars. Its 2.4L inline‑6 delivered 151 horsepower—impressive for the era—and its styling paid homage to European grand tourers at a fraction of the cost.

    Suzuki Cappuccino (1991–1998)

    This pocket‑rocket roadster meets kei‑car regulations with a turbocharged 660cc engine and removable hardtop. Enthusiasts revere its RWD layout, cable‑shift gearbox, and engaging driving dynamics—qualities that make even diminished‑displacement classics highly coveted.

    Nissan Skyline GT-R R34 (1999–2002)

    With its RB26DETT twin‑turbo inline‑6, ATTESA E‑TS all‑wheel‑drive, and HICAS rear steering, the R34 pushed technical boundaries. Its cult status skyrocketed thanks to Gran Turismo, Fast & Furious, and rarity outside Japan—factors that have driven import‑legal R34 values into the six‑figure range.

    Why Japanese Classic Car Value Continues Rising

    Several converging trends fuel Japanese classic car values:

    • Limited Supply: Many JDM models were produced in low volumes or crashed and rusted away in Japan’s salt‑coastal regions.
    • Import Legalization: U.S. 25‑year rules and UK “Show & Display” allowances open the door to rare models.
    • Motorsport & Media Hype: Games, movies, and vintage racing series showcase JDM stars, elevating demand.
    • Community & Heritage: Enthusiast clubs, meets, and online forums preserve the lore and encourage preservation.
    • Restoration & Restomods: Skilled builders combine classic styling with modern safety and performance, creating turnkey collector cars.

    Spotting Future JDM Classics

    Not every Japanese model will soar in value. Look for cars that meet these criteria:

    1. Technical Innovation: Early turbo, limited‑slip differentials, or all‑wheel‑drive systems.
    2. Cultural Impact: Strong appearances in motorsports, media, or period tuner culture.
    3. Rarity & Condition: Low production numbers, original parts, minimal rust, and unmodified examples.
    4. Community Endorsement: Active club support, restoration guides, and documented provenance.

    Protecting Your JDM Investment

    To preserve value, follow these best practices:

    • Rust Prevention: Treat chassis and sills with undercoating. Store in a dry, climate‑controlled space.
    • Service History: Keep detailed records of maintenance, OEM parts usage, and any modifications.
    • Sympathetic Restoration: Use period‑correct components and colors to maintain authenticity.
    • Insurance & Documentation: Insure for agreed value and keep import, title, and “Show & Display” paperwork secure.
    • Community Engagement: Join local JDM clubs, show your car at meets, and share build documentation to enhance desirability.

    FAQs

    Q1: Are right‑hand‑drive JDM cars legal in the U.S.?
    A1: Yes—vehicles over 25 years old are exempt from FMVSS compliance. Modern exceptions exist under “Show & Display” rules for historically significant models.
    Q2: Why do some JDM models cost six figures?
    A2: Rarity, historic motorsport pedigree, celebrity exposure, and low survivor counts combine to push prices on cars like the R34 GT-R and Zephyr Z432 into the collector stratosphere.
    Q3: Is restoring a JDM classic worth the investment?
    A3: A sympathetic restoration that maintains originality often appreciates faster than the restoration cost—especially for highly sought‑after models with documented histories.

    Conclusion & Next Steps

    The JDM scene thrives on innovation, scarcity, and passionate communities. As JDM culture spreads globally and Japanese classic car values continue their ascent, understanding market drivers and preservation techniques is key. Start by researching your dream model’s history, connect with enthusiasts, and take steps to maintain originality—your investment in automotive heritage awaits.

  • Towing a Trailer: Weight Distribution, Mirrors, and Braking

    Towing a Trailer: Weight Distribution, Mirrors, and Braking

    Hook: Hauling a trailer adds versatility to your vehicle—but improper setup can lead to sway, poor handling, or even accidents. This towing trailer guide covers key principles of trailer weight distribution, mirror adjustment, and braking strategies for safe towing.

    • How to achieve correct tongue weight and balance
    • Mirror setup for maximum visibility
    • Braking techniques to control trailer momentum

    Why Proper Weight Distribution Matters

    Uneven or excessive tongue weight (the downward force at the hitch) can overload your rear axle, reduce front-wheel traction, and cause trailer sway. Aim for 10–15% of the total trailer weight on the hitch. For example, a 3,000 lb trailer should exert 300–450 lb tongue weight. Use a quality hitch scale to verify and adjust by redistributing cargo fore and aft in the trailer.

    Step 1: Loading & Balancing the Trailer

    1.1 Position Heavy Items Over Axle

    Place batteries, water tanks, and other heavy cargo directly above or slightly forward of the trailer axle. This centralizes weight and minimizes side-to-side imbalance.

    1.2 Front-to-Rear Cargo Placement

    Shift lighter gear (chairs, camping supplies) toward the rear, but avoid stacking so far back that tongue weight drops below 10%. If you’re below spec, move 50–100 lb of cargo forward to restore proper pressure.

    1.3 Secure & Tie Down

    Use ratchet straps and bungee cords to prevent cargo from shifting under acceleration or during sudden stops. A moving load can instantly alter distribution and create sway.

    Step 2: Adjusting Mirrors for Full Visibility

    With the trailer attached and loaded, sit in the driver’s seat and adjust your side-view mirrors so that:

    • You can see the full length of the trailer’s side without leaning.
    • The horizon line bisects each mirror, minimizing blind spots above or below.
    • Objects directly beside your trailer appear at the inner edge of the mirror.

    If your vehicle lacks extendable mirrors, consider clip-on mirror extensions to maintain legal visibility of adjacent lanes.

    Step 3: Braking & Controlling Momentum

    3.1 Trailer Brakes vs. Vehicle Brakes

    Electric trailer brakes—activated by your vehicle’s brake controller—help share stopping load. Set the gain so that light stops engage trailer brakes first, then vehicle brakes under heavier loads.

    3.2 Smooth, Early Braking

    Begin braking earlier than you would unhitched. Allow at least twice the normal stopping distance in wet or downhill conditions. Progressive pedal pressure prevents trailer “jack-knifing.”

    3.3 Sway Control

    If you detect sway, hold the steering steady and lightly tap the trailer-brake override button. This applies only trailer brakes, which realigns hitch and tow vehicle without wheel lock-up.

    Pro Tips for Safe Towing

    • Inspect Hitch & Hardware: Check for cracks, rust, or loose bolts before every trip.
    • Use Weight-Distribution Hitch: For heavy trailers, spring bars can transfer load to front axle and improve steering response.
    • Monitor Tire Pressure: Underinflated tires on tow vehicle or trailer reduce stability—check pressures cold.
    • Practice in Low-Traffic Areas: Rehearse backing and turning maneuvers before hitting busy roads.
    • Keep Speed Under 60 mph: High speeds amplify sway and reduce reaction time.

    Common Pitfalls to Avoid

    1. Overloading the Rear: Too much cargo at the back raises front end and hampers steering.
    2. Ignoring Sway Symptoms: Correct immediately—continuing to drive through sway can escalate to loss of control.
    3. Braking Hard Without Trailer Brakes: Relying solely on your vehicle’s brakes lets the trailer push you forward under heavy stop.
    4. Poor Mirror Adjustment: Blind spots hide adjacent cars—regularly verify mirror angles on long trips.

    FAQs

    Q1: How do I calculate tongue weight?
    A1: Use a bathroom scale under the jack foot with trailer level. Measure total trailer cargo, then adjust load until the jack reads 10–15% of that weight.
    Q2: Is a weight-distribution hitch necessary?
    A2: For trailers over 50% of tow vehicle’s curb weight or frequent mountain driving, yes—it prevents nose-lift and enhances steering control.
    Q3: What if I can’t install electric trailer brakes?
    A3: Invest in a mechanical surge brake system. It applies trailer brakes hydraulically during tow vehicle deceleration, though tuning is less precise than electric.

    Conclusion & Next Steps

    Following this towing trailer guide—from perfecting trailer weight distribution to mirror setup and braking strategies—will make every haul safer and more predictable. Before your next trip, run through this checklist: scale your tongue weight, test your mirrors, and verify brake controller settings. Master these steps, and you’ll tow like a pro every time!

  • Braking and accelerating for a car turning on a mountain road

    Braking and accelerating for a car turning on a mountain road

    Hook: Mountain roads demand precision: brake too late or accelerate too early and you risk understeer, oversteer, or even running off the road. These proven mountain driving tips and refined cornering techniques will guide your brake and throttle inputs so you can tackle every bend with confidence.

    • Why coordinated brake-throttle control is essential on elevation changes
    • How to sequence braking and acceleration for maximum traction
    • Pro tips to blend inputs smoothly for safer, faster corner entries and exits

    1. Understanding Weight Transfer on Slopes

    When braking, weight shifts forward and compresses the front suspension—boosting front grip but unloading the rear. Conversely, accelerating transfers load rearward, increasing rear traction while lightening the front. On mountain roads this effect is magnified by gradients:

    • Uphill Corner Entry: Engine braking helps slow the car, but too much throttle mid-turn can reduce front grip.
    • Downhill Corner Entry: Braking before the turn is crucial, since downhill momentum amplifies weight transfer.

    2. Braking Strategy for Mountain Curves

    2.1 Brake Early in a Straight Line

    Whether ascending or descending, finish your braking on the straight approach. Target a speed about 20–30% below your dry-test pace to allow safe margin. Apply firm, progressive pressure, using ABS or threshold braking to avoid lock-ups.

    2.2 Modulate for Gradient

    On downhill entries, start braking slightly earlier to compensate for increased inertia. On uphill entries, you can rely partially on engine braking, but don’t sacrifice throttle control entirely—maintain enough rpm to avoid lugging the engine.

    2.3 Trail Braking (Advanced)

    For experienced drivers, gently ease off brake pressure into the turn to keep weight over the front tires. This technique sharpens turn-in grip but requires precise modulation—practice on smooth, low-traffic mountain stretches first.

    3. Seamless Acceleration Exits

    3.1 Wait for the Apex

    Only introduce throttle once your wheels begin to straighten past the apex. Premature acceleration shifts weight rearward too soon, lightening the front end and causing understeer.

    3.2 Progressive Throttle Roll-On

    Gradually increase throttle in a smooth arc. This balanced application shifts weight rearward steadily, enhancing front tire grip during the transition from braking to acceleration.

    3.3 Gear Selection & RPM

    Stay in a gear that keeps the engine in its optimal torque band (1,500–2,500 rpm). On uphill exits, higher revs ensure you have power ready; on downhill exits, you can downshift to maintain engine braking control if needed.

    4. Putting It All Together: A Step-By-Step Sequence

    1. Approach & Vision: Scan ahead for road camber, surface debris, and exit visibility.
    2. Brake in a Straight Line: Apply firm, steady pressure—finish before steering input.
    3. Shift & Balance: Select the correct gear, release brake fully, and find the bite point if using trail braking.
    4. Turn-In: Steer smoothly to your chosen line; maintain slight brake pressure if trail braking.
    5. Apex Hold: Slightly unwind steering and keep brake off; keep throttle neutral until past the apex.
    6. Accelerate Out: Roll on throttle progressively, straighten the wheel, and allow weight transfer rearward.
    7. Stabilize: Resume normal driving posture and prepare for the next corner.

    5. Pro Tips & Advanced Tricks

    • Brake Balance Adjustment: If your car allows, bias more braking force to the front on downhill bends to prevent rear lock-up.
    • Tire Pressure Tuning: Slightly softer rear pressures can help maintain grip under engine braking, while firmer fronts aid turn-in precision.
    • Use Road Camber: Stay on the high side of the lane in right-hand turns to counteract the road’s banking.
    • Hand-Brake Technique (Low Traction): In loose or snowy conditions, a brief hand-brake tug can initiate rotation—but only for advanced drivers.
    • Practice in Clear Conditions: Master inputs on dry tarmac before attempting them in rain or snow.

    6. Common Pitfalls to Avoid

    1. Braking Mid-Corner: Releases front grip abruptly and risks a snap oversteer.
    2. Sudden Throttle Application: Spins rear wheels if applied before enough front grip returns.
    3. Wrong Gear: Being in too high a gear starves you of power on exit; too low a gear can over-rev and upset balance.
    4. Ignoring Surface Changes: Gravel, wet leaves, or ice dramatically alter traction—reduce speed and avoid harsh inputs.

    FAQs

    Q1: Should I downshift before braking or during corner entry?
    A1: Ideally downshift after finishing braking but before turn-in. This avoids engine braking upsetting balance mid-corner.
    Q2: Can I use engine braking alone on downhill corners?
    A2: Engine braking helps, but supplement with light pedal braking to fine-tune speed—especially when the gradient increases.
    Q3: How do I practice without risking safety?
    A3: Find deserted uphill/downhill stretches or closed-course facilities to rehearse brake-then-accelerate sequences at low speeds.

    Conclusion & Next Steps

    By blending precise braking with smooth acceleration and following these mountain driving tips and cornering techniques, you’ll navigate even the twistiest mountain roads with poise. Start slowly, focus on each phase—brake, turn-in, accelerate—and progressively increase pace as your confidence grows. Safe driving and enjoy every mile of your mountain adventure!

  • Wet-Road Handling: Braking and Hydroplaning Recovery

    Wet-Road Handling: Braking and Hydroplaning Recovery

    Hook: Slamming on the brakes in heavy rain can lead to skids, and hitting a patch of standing water may send you aquaplaning out of control. Master these wet road driving skills and hydroplaning recovery techniques to stay safe when the pavement turns slick.

    • Key braking adjustments for maximum traction
    • Step-by-step hydroplaning recovery method
    • Pro tips to minimize risks on rain-soaked roads

    1. Adjust Your Braking Technique for Wet Conditions

    On wet pavement, your tires have up to 50% less grip than on dry roads. To compensate:

    • Increase following distance: Double your normal gap to allow extra stopping room.
    • Brake early and gently: Apply steady, light pressure—avoid hard, abrupt braking that locks up wheels.
    • Use threshold braking (non-ABS vehicles): Apply firm pressure just below the point where wheels begin to skid.
    • Pump brakes (non-ABS): If you feel wheel lock-up, quickly pump the pedal to restore rotation and grip.

    2. Recognize & Recover from Hydroplaning

    Hydroplaning happens when a thin water layer lifts your tires off the pavement, causing loss of steering and braking control. Follow these steps:

    Step 1: Stay Calm & Remove Foot from Pedals

    Don’t jam on brakes or goose the throttle. Ease off both accelerator and brake to let the car slow naturally.

    Step 2: Steer Straight & Avoid Sudden Inputs

    Keep the wheel centered. Jerked steering motions can trigger a spin once grip returns.

    Step 3: Feel for Grip Return

    When tires reconnect, you’ll feel slight feedback through the steering wheel and a drop in engine RPM. Maintain gentle control—don’t chase the wheel.

    Step 4: Resume Controlled Braking

    Once you have traction, reapply brakes smoothly. If you need to slow more quickly, use light, repeated pressure rather than a single hard push.

    3. Pro Tips to Stay Safe on Wet Roads

    • Avoid standing water: Swerving around large puddles reduces hydroplaning risk.
    • Proper tire maintenance: Ensure tread depth is above 3/32″ and tires are inflated to spec for optimal water evacuation.
    • Downshift early: In manual cars, use engine braking in higher gears to reduce reliance on traction-limited brakes.
    • Use cruise control wisely: Turn it off in heavy rain—automatic throttle inputs can increase hydroplaning chances.
    • Choose safe lines: Follow the tracks left by vehicles ahead, where water film is thinner.

    4. Common Pitfalls to Avoid

    1. Over-braking: Panic stops lock wheels and eliminate any remaining traction—avoid stamping on the pedal.
    2. Sharp steering: Jerky turns during a skid can cause a spin—keep inputs smooth and deliberate.
    3. Ignoring warning signs: Spray from other cars and reduced engine sound are early indicators—slow down at the first hint of spray.
    4. Worn tires: Bald or unevenly worn tires drastically reduce hydroplaning thresholds—inspect and replace promptly.

    FAQs

    Q1: What speed causes hydroplaning?
    A1: Most tires can hydroplane above 35–55 mph on deep water—slow to below 35 mph when heavy rain or standing water is present.
    Q2: Can AWD prevent hydroplaning?
    A2: All-wheel drive helps with acceleration on wet roads but does not improve braking or cornering traction—skills and tires are still critical.
    Q3: Should I use ABS or pump brakes?
    A3: If your car has ABS, apply firm, continuous pressure. If you don’t, pump the brakes to prevent wheel lock-up and restore traction.

    Conclusion & Next Steps

    Understanding these wet road driving skills—from gentle braking modifications to precise hydroplaning recovery steps—can make a life-saving difference. Before your next rainy drive, check tire condition, reduce speed, and stay alert to roadway hazards. With practice and preparedness, you’ll navigate slick surfaces with confidence and control.

  • Night-Driving Safety Checklist: Lighting, Glare, Fatigue

    Night-Driving Safety Checklist: Lighting, Glare, Fatigue

    Hook: Driving after dark increases risks from reduced visibility, oncoming headlights, and driver fatigue. Following this night driving safety checklist will help you manage your vehicle’s lighting, minimize glare, and stay alert so you can navigate the roads with confidence.

    • Essential lighting checks before you roll
    • Techniques for glare reduction in your car
    • Strategies to combat nighttime fatigue

    1. Inspect Your Headlights & Taillights

    Clean, properly aimed headlights are your first line of defense. Check both low and high beams by turning them on in a dark area and confirming they illuminate the road evenly. Replace any bulbs that show dimming or color shifts. Don’t forget taillights, brake lights, and turn signals—functional rear lighting ensures vehicles behind you can anticipate your moves.

    2. Aim & Adjust for Optimal Beam Pattern

    Misaligned headlights can blind oncoming drivers or fail to light your path. Park 25 feet from a wall, turn on low beams, and mark the center of each beam. Adjust the vertical and horizontal aim using the screws on your headlight housing until patterns line up with vehicle specifications in your owner’s manual.

    3. Use Night-Specific Glasses & Windshield Treatments

    Anti-reflective night-driving glasses reduce interior glare from dashboard lights and passing headlights. Consider applying a hydrophobic treatment to your windshield to repel water droplets and improve clarity in rain. A clean, streak-free windshield is critical—use a quality glass cleaner and microfiber towel before every nighttime drive.

    4. Minimize Interior Reflections & Dashboard Brightness

    Interior lights and bright gauges can create distracting reflections on your windshield. Dim or turn off unnecessary cabin lights, and set your instrument panel to its lowest comfortable brightness. Cover reflective surfaces on your dash with a non-reflective mat to further reduce glare.

    5. Combat Glare from Oncoming Traffic

    Glare from high beams can temporarily blind you. Look toward the right edge of the road and use lane markings as a guide. Avoid staring directly at headlights. If vehicles don’t dip their beams, briefly flash your high beams once to remind them—then return to low beams immediately.

    6. Keep Mirrors & Exterior Glass Clean

    Dirty side mirrors and windows amplify glare and scatter light. Clean all exterior glass surfaces regularly, including side mirrors. Tilt side mirrors downward slightly at night to reduce reflections from vehicles behind you, and use your rearview mirror’s “night” or “auto-dim” setting if available.

    7. Plan Breaks to Fight Fatigue

    Driving at night can accelerate fatigue. Schedule a 15-minute break every two hours or 100 miles. Use this time to stretch, walk around, and hydrate. Even a brief rest can reset your alertness and reduce the risk of microsleeps behind the wheel.

    8. Use Caffeine & Healthy Snacks Strategically

    A cup of coffee or tea can enhance alertness for 2–3 hours. Combine caffeine with a light, protein-rich snack—nuts or cheese cubes—to avoid sugar crashes. Avoid heavy meals before driving, as digestion can cause drowsiness.

    9. Adjust Your Driving Style

    Reduce speed to compensate for limited visibility. Increase following distance to at least four seconds at night. In rural areas, watch for wildlife near illuminated patches in the road, and be prepared to brake smoothly.

    10. Leverage Vehicle Safety Features

    Modern cars offer features like adaptive headlights, automatic high-beam control, and night-vision assist. Engage these systems if available, but don’t rely solely on them—stay vigilant and maintain manual control over lighting switches.

    Common Pitfalls to Avoid

    1. Relying on high beams continuously: High beams can blind other drivers—use them sparingly and switch back promptly.
    2. Ignoring eye strain: If your eyes feel dry or tired, stop and rest—eye drops and brief naps can help.
    3. Overdriving headlights: Don’t drive faster than your headlights illuminate—adjust speed so you can stop within visible range.

    FAQs

    Q1: How often should I replace my headlight bulbs?
    A1: Replace halogen bulbs every 2–3 years or when you notice dimming; LED and HID units can last longer but still require periodic checks.
    Q2: Are tinted windshields safe at night?
    A2: Dark tints reduce glare but can also impede visibility. Ensure your tint complies with local regulations and doesn’t hinder your night vision.
    Q3: Can I use high beams on rural roads?
    A3: Yes, but be ready to switch to low beams when you detect oncoming vehicles or follow another car to prevent glare.

    Conclusion & Next Steps

    Incorporating these night driving safety measures—proper lighting checks, glare reduction car techniques, and fatigue management—transforms after-dark driving into a safer, more comfortable experience. Perform this checklist before your next night trip, and you’ll navigate darkness with confidence and control.

  • Hill Starts Without Rolling Back: Step-by-Step

    Hill Starts Without Rolling Back: Step-by-Step

    Hook: Nervous about stalling or rolling backward on a steep incline? This hill start tutorial will guide you through a foolproof method for a manual transmission hill start, so you can conquer hills confidently without practice parking brake tricks or expensive training.

    • Why mastering hill starts improves safety and confidence
    • Precise clutch-and-throttle coordination in five clear steps
    • Pro tips to avoid stalling and rollback every time

    Why Proper Hill Starts Matter

    Rolling backward on a hill can surprise drivers behind you and cause bumper dings or collisions. For manual drivers, a reliable manual transmission hill start technique keeps you in control, prevents clutch wear from half-clutch riding, and builds confidence in stop-and-go traffic or narrow mountain roads. Whether you’re new to stick shifts or refreshing your skills, a solid hill start tutorial is essential.

    Step-by-Step Hill Start Tutorial

    1. Engage the Parking Brake & Clutch

    With the engine running, press the clutch pedal fully to the floor and shift into first gear. Pull up the parking brake lever to hold the car against the hill. This setup eliminates rollback while you prepare for the launch.

    2. Find the Bite Point

    Slowly release the clutch until you feel the engine begin to pull—the “bite point.” The revs may dip slightly and the car shudders as the clutch plates engage. Hold the pedal steady at this point; the car should remain stationary with the parking brake engaged.

    3. Apply Throttle—Just Enough

    Gently press the accelerator to raise engine RPM to around 1,500–2,000. Too little throttle risks stalling; too much spins the wheels. Aim for a smooth, controlled rise, allowing the engine to deliver torque exactly when the clutch releases.

    4. Release the Parking Brake Smoothly

    While maintaining the bite point and steady throttle, slowly lower the parking brake. The car will begin to move forward—ensure it does so without jerking by keeping the clutch in its bite zone until full engagement.

    5. Fully Release the Clutch & Drive Off

    Once the car moves, continue to ease out the clutch completely and smoothly transition throttle control to the accelerator. Accelerate steadily to climbing speed in first gear, then shift to second when RPM reaches about 2,500–3,000.

    Pro Tips & Advanced Tricks

    • Use hill-hold features: If your car has an electronic hill-start assist, engage it—but still practice manual technique for full control.
    • Heel-toe positioning: Keep your heel on the floor and pivot to the throttle while clutch is down for quicker coordination.
    • Clutch warm-up: In cold weather, briefly warm the clutch by slipping at a safe bite point before tackling steep grades.
    • Smooth inputs: Jerky clutch or throttle movement can jolt the car—focus on gradual pedal travel.
    • Practice on mild slopes: Build muscle memory on 5–10% grades before trying steeper roads.

    Common Pitfalls to Avoid

    1. Riding the clutch: Holding the clutch at the bite point too long wears the friction plate—use the parking brake to hold position instead.
    2. Over-revving: Excessive throttle causes wheel spin and poor traction—match RPM to road conditions.
    3. Dropping the parking brake too fast: Releasing it in one motion can cause rollback or lurching—lower it smoothly.
    4. Ignoring road conditions: Wet or gravel surfaces reduce grip—adjust throttle and bite point accordingly.

    FAQs

    Q1: Can I use first-gear creep instead of the parking brake?
    A1: In mild slopes you can hold at the bite point without the parking brake, but on steeper hills it’s safer to engage the handbrake until you’re ready to move.
    Q2: What if my car stalls at the bite point?
    A2: Increase RPM slightly and find a smoother bite point—stalling often means the clutch isn’t fully at its engagement position.
    Q3: How do I downshift on a hill start?
    A3: After moving off in first gear, shift to second at normal RPM. Save downshifts for gear changes rather than initial launch.

    Conclusion & Next Steps

    With this hill start tutorial, you’ll conquer inclines confidently and protect your clutch. Practice each step methodically—soon the process will feel second nature, even in high-pressure traffic. Next time you face a steep drive, remember: bite point first, steady throttle, and smooth parking brake release. Happy climbing!

  • 11	Eco-Driving Hacks That Save Up to 20% on Fuel

    11 Eco-Driving Hacks That Save Up to 20% on Fuel

    Hook: Want to spend less at the pump while reducing your carbon footprint? These simple eco driving tips and optimized fuel efficiency driving habits can cut your fuel consumption by up to 20%. Read on to learn practical hacks that pay for themselves in no time.

    • Key behaviors that improve mileage without sacrificing convenience
    • Quick vehicle checks and in-drive strategies
    • Pro tips to lock in long-term fuel savings

    Why Eco-Driving Matters

    Efficient driving not only lowers your fuel bills but also reduces emissions and wear on your car. By adopting smarter driving habits, you extend engine life, reduce maintenance costs, and contribute to cleaner air. These eco driving tips are easy to integrate into your daily routine, whether you commute, carpool, or run errands.

    Top Eco-Driving Hacks

    1. Smooth Acceleration & Braking

    Aggressive starts and stops burn extra fuel. Accelerate gently to 20 mph rather than flooring the throttle, and anticipate traffic so you can coast to a stop instead of slamming the brakes. This smooth approach reduces wasted energy and improves fuel efficiency driving habits.

    2. Maintain Steady Speed

    Use cruise control on highways to hold a constant speed—ideally between 50–65 mph. Avoid unnecessary speed bursts, as aerodynamic drag rises exponentially above 65 mph. A stable pace conserves momentum and fuel.

    3. Keep Tires Properly Inflated

    Underinflated tires increase rolling resistance, costing up to 3% in fuel economy. Check tire pressure monthly and inflate to the manufacturer’s recommended PSI. For best results, measure when the tires are cold.

    4. Lighten Your Load

    Remove bulky items and roof racks when not in use—every extra 100 lbs can reduce MPG by about 1%. Store golf clubs or cargo boxes in the garage and only carry what you need for daily trips.

    5. Minimize Idling

    Idling for more than 10 seconds uses more fuel than a brief shutdown and restart. Turn off your engine during extended waits—at school pick-ups or drive-thrus—to eliminate wasted fuel and emissions.

    6. Use Higher Gears

    In manual vehicles, shift up early to keep engine RPM low. In automatics, use “Eco” mode if available. Lower RPMs reduce internal friction and fuel consumption.

    Pro Tips & Advanced Tricks

    • Plan your route to avoid traffic jams and high-stop areas—use real-time navigation apps with eco-friendly routing options.
    • Time your trips during off-peak hours to maintain steady speeds and avoid excessive braking.
    • Combine errands into one trip to reduce cold starts, which burn more fuel in the first few miles.
    • Use your car’s built-in trip computer to monitor average MPG and set incremental improvement goals.
    • Perform regular engine tune-ups and replace clogged air filters to ensure optimal combustion efficiency.

    Common Pitfalls to Avoid

    1. Overusing air conditioning: AC can reduce fuel economy by up to 10%—use vent mode or crack a window at low speeds.
    2. Ignoring maintenance: Dirty spark plugs, low engine oil, and worn-out oxygen sensors all degrade mileage—stay on schedule.
    3. Heavy foot on throttle: Rapid throttle inputs negate coasting benefits—focus on gradual pedal control.

    FAQs

    Q1: How much can I really save with eco-driving?
    A1: Most drivers see a 10–20% improvement in MPG when consistently applying these eco driving tips and fuel efficiency driving habits.
    Q2: Does warming up my car in cold weather waste fuel?
    A2: Modern engines require minimal warm-up—start driving gently after 30–60 seconds rather than idling for several minutes.
    Q3: Is it worth investing in a fuel-efficient vehicle if I already drive economically?
    A3: Yes—while good habits boost any car’s economy, a fuel-efficient model can offer an additional 20–40% savings on top of your eco-driving gains.

    Conclusion & Next Steps

    Incorporate these eco driving tips into your routine, and you’ll see noticeable savings at the pump. Start with one hack at a time—then combine them for maximum effect. Your wallet, your car, and the environment will all thank you for adopting smarter fuel efficiency driving habits.