Category: Owner’s Guides

  • Ultimate Car Detailing at Home: Tools, Steps, and Budget

    Ultimate Car Detailing at Home: Tools, Steps, and Budget

    Hook: Dreaming of showroom shine without the shop price? Mastering car detailing at home is easier than you think—with the right detailing tools and a systematic approach, your ride can look better than new. Follow this DIY auto detailing guide to transform your car in a single weekend.

    • Essential tools and supplies for every budget
    • Step-by-step detailing process from wash to protect
    • Pro tips to elevate your finish and avoid common mistakes

    Why Home Detailing Matters

    Regular professional detailing can cost $150–$300 per session. Investing in car detailing at home not only saves money but also lets you control products and techniques. You maintain paint gloss, protect against UV damage, preserve interior materials, and boost resale value—all at a fraction of the cost.

    Must-Have Detailing Tools & Supplies

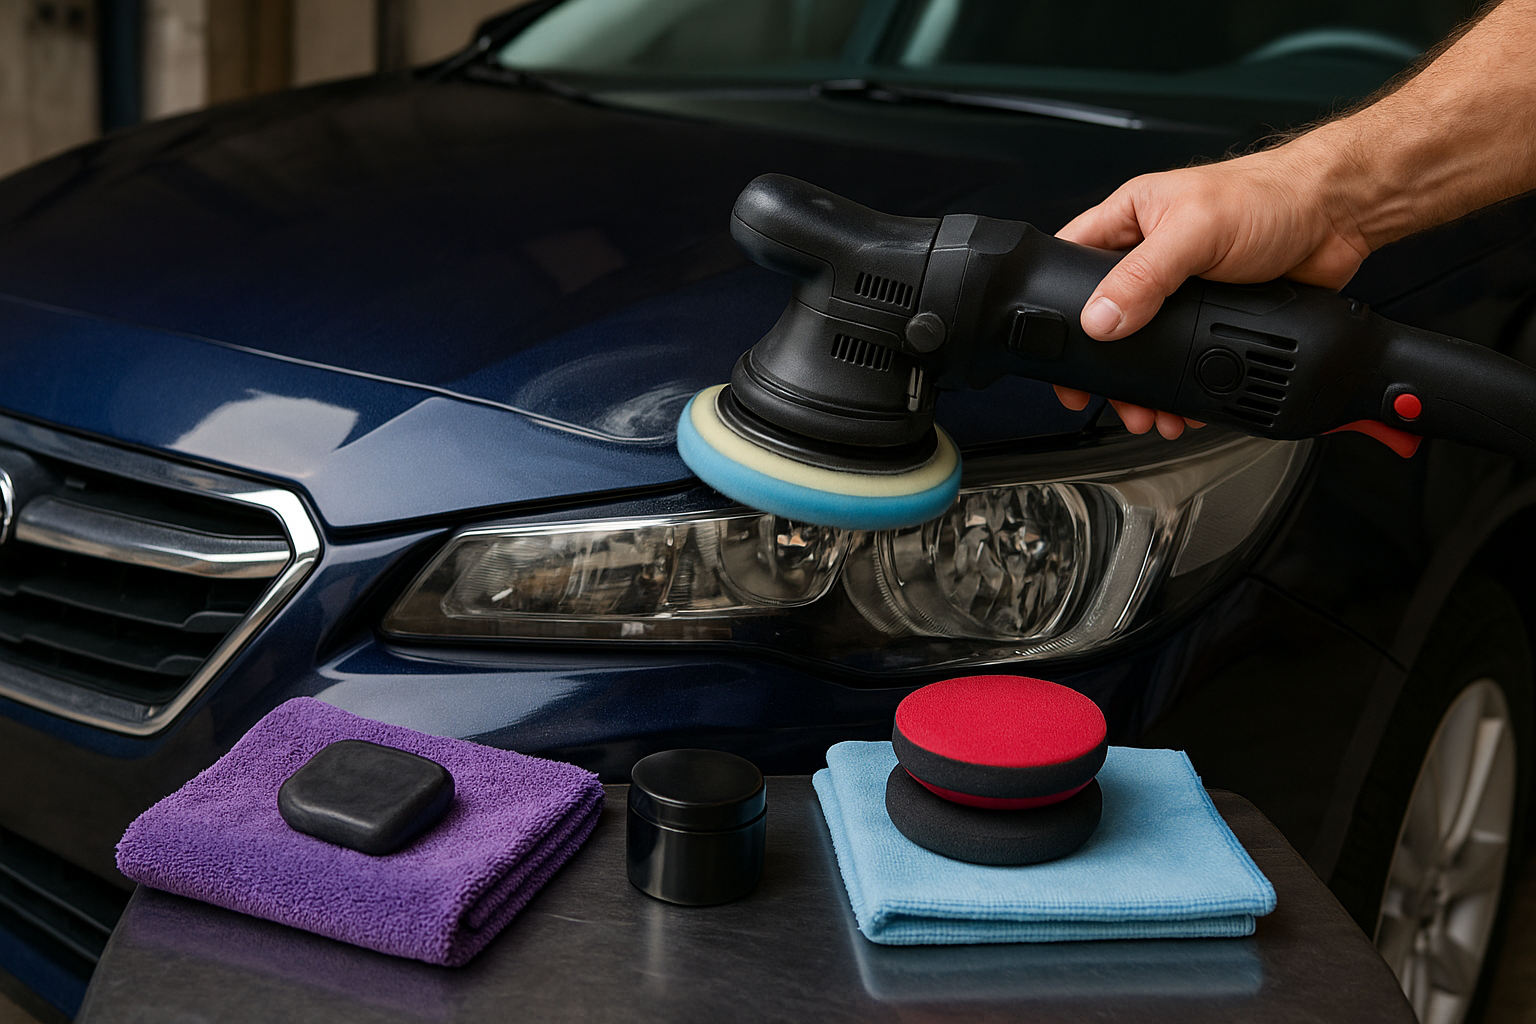
    • Dual-action polisher: Reduces swirl marks and speeds up polishing.
    • Microfiber wash mitts & towels: Gentle on paint and lint-free.
    • Foam cannon or spray bottle: For pre-soak and snow-foam wash.
    • Clay bar kit: Removes embedded contaminants from paint.
    • Compound, polish & wax or sealant: Three stages for depth and protection.
    • Interior brush set: Soft-bristle brushes for vents, seams, and crevices.
    • All-purpose cleaner (APC): Degreases wheels, door jambs, and engine bay.
    • Glass cleaner & applicators: Streak-free windows and mirrors.

    Step-by-Step DIY Auto Detailing Process

    1. Pre-Wash & Wheel Cleaning

    Rinse the entire car with a pressure washer or hose. Apply snow foam via foam cannon or spray bottle—let it dwell for 5–7 minutes. Use an APC and wheel brush to remove brake dust, then rinse thoroughly.

    2. Two-Bucket Wash

    Fill two buckets—one with soapy water, one with clean rinse water. Use a microfiber mitt to wash panels from the top down, rinsing the mitt in the clean bucket after each panel to minimize swirl risk.

    3. Decontamination (Claying)

    Spray a clay lubricant, knead the clay bar until pliable, and glide over paint to lift bonded contaminants. Wipe with a microfiber towel before moving to polishing.

    4. Paint Correction & Protection

    Apply compound with a dual-action polisher to remove light scratches and oxidation. Follow with a fine polish for gloss, then spread wax or paint sealant for long-lasting protection. Buff off residues with a clean microfiber towel.

    5. Trim, Glass & Interior

    Dress exterior plastics and tires with a dedicated trim restorer. Clean glass inside and out with streak-free glass cleaner. Inside, vacuum carpets and seats, use APC on vinyl and plastics, and brush crevices. Finish leather surfaces with a conditioner.

    Pro Tips & Advanced Tricks

    • Work in shade and on a cool surface to prevent products from drying too quickly.
    • Use color-coded microfiber towels to avoid cross-contamination (e.g., red for wheels, blue for paint).
    • Mask off plastic trim and badges before polishing to prevent compound buildup.
    • Finish with a quick detailer spray between washes to maintain gloss and hydrophobic effect.
    • Invest in quality polish pads—foam pads for cutting, microfiber pads for polishing.

    Common Pitfalls to Avoid

    1. Using dish soap for wash: Strips wax and degrades clear coat—always use pH-balanced car shampoo.
    2. Skipping clay bar: Polishing over contaminants can leave swirl marks and dull the paint.
    3. Overloading the polisher: Too much compound creates haze; apply in thin layers and buff thoroughly.
    4. Neglecting wheel arches & jambs: Dirt buildup corrodes metal—clean these areas regularly.

    FAQs

    Q1: How often should I detail my car at home?
    A1: Aim for a full DIY detail every 3–4 months; maintain with wash and quick detail spray every 2–4 weeks.
    Q2: Can I skip polishing and just wax?
    A2: Wax bonds to existing clear coat. If your paint is dull or has light scratches, polishing first ensures the best shine and protection.
    Q3: Is a dual-action polisher necessary?
    A3: It’s highly recommended—DA polishers are safer than rotary machines for beginners and deliver professional results with less risk of clear coat damage.

    Conclusion & Next Steps

    By following this DIY auto detailing process and investing once in key detailing tools, you’ll achieve professional-grade gloss and protection on your own schedule. Start with a basic kit and build your collection over time—your car (and wallet) will thank you. Ready to shine? Gather your tools, clear your weekend, and get detailing!
  • Understanding the 12-Volt Battery in Electric Cars

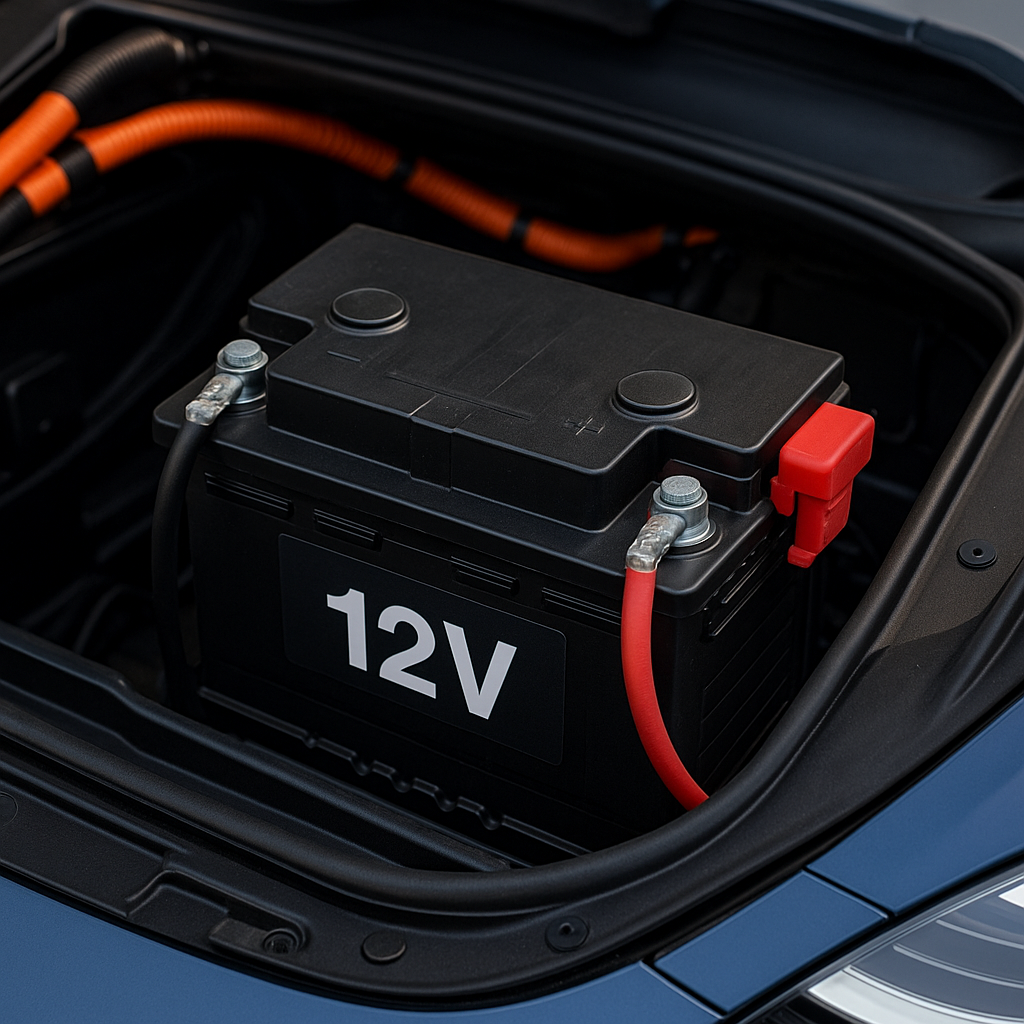
    Understanding the 12-Volt Battery in Electric Cars

    Hook: Think electric vehicles run solely on high-voltage traction packs? They still rely on a trusty EV 12v battery to power lights, locks, infotainment, and safety systems. In this guide to electric car maintenance basics, we’ll uncover why that small battery matters and how to keep it healthy.

    • Explore the role of the 12-volt battery in modern EVs
    • Learn how the 12v system is charged and managed
    • Get practical maintenance tips and avoid common failure modes

    Why Electric Cars Still Have a 12-Volt Battery

    Although the main traction battery handles propulsion, the EV 12v battery runs all low-voltage accessories and control modules:

    • Safety Systems: Airbags, ABS, electronic stability control.
    • Body Electronics: Door locks, windows, wipers, lighting.
    • Infotainment & Controls: Touchscreen, audio, digital instrument cluster.
    • HVAC & Comfort: Climate control blowers, seat heaters, power seats.

    Using a separate 12-volt circuit isolates accessory loads from the high-voltage pack and simplifies vehicle architecture by reusing automotive-standard components.

    How the 12-Volt System Works in EVs

    1. DC–DC Converter Charging

    Instead of an alternator, EVs use a DC–DC converter to step down the high-voltage battery voltage (200–800 V) to 12 V. This converter regulates charging current to maintain the 12v battery at optimal state-of-charge without overcharging.

    2. Battery Management & Protection

    EV control units monitor the 12v battery’s voltage, temperature, and health. If the voltage drops below a safe threshold, the vehicle may disable non-essential accessories or refuse to start until the battery is recharged.

    3. Startup & Sleep Modes

    When parked, the 12-volt system enters a low-current sleep mode to preserve charge. Upon “power on,” the converter activates and restores full voltage to accessories before the car’s main systems come online.

    Maintenance Tips for Your EV’s 12-Volt Battery

    • Regular Health Checks: Many EVs allow monitoring of 12v battery state-of-health via the infotainment system—check monthly for voltage below 12.4 V at rest.
    • Keep It Warm: Extreme cold slows battery chemistry. Park in a garage or use a thermal blanket for climates below freezing.
    • Minimize Parasitic Loads: Avoid extended accessory use (e.g., lights, climate fan) when the vehicle is off to prevent slow discharge.
    • Use Quality Replacements: If replacement is needed, choose AGM or EFB batteries rated for automotive use to handle cyclic loads and regenerative charge pulses.
    • Secure Connections: Corroded or loose terminals can cause voltage drops—inspect and clean connections annually.

    Common Pitfalls to Avoid

    1. Ignoring Low-Voltage Warnings: Dismissing accessory glitches or warning messages can lead to complete 12 V failure and leave you stranded.
    2. Overlooking Sleep-Mode Drains: Leaving aftermarket devices (dash cams, chargers) plugged in can slowly deplete the battery over days.
    3. Choosing Incorrect Battery Type: Using a flooded lead-acid battery instead of AGM/EFB may result in reduced lifespan under EV charging profiles.

    FAQs

    Q1: How often should I replace my EV’s 12-volt battery?
    A1: Most 12 V batteries last 3–5 years in EV service. Monitor voltage and replace if resting voltage falls below 12.2 V or if the car reports reduced battery capacity.
    Q2: Can I jump-start an EV like a gasoline car?
    A2: Yes—you can jump off another 12 V source, but follow the manufacturer’s procedure carefully to avoid damaging sensitive electronics.
    Q3: Will a dead 12-volt battery disable my EV completely?
    A3: Yes—without 12 V power, the DC–DC converter won’t run and the vehicle cannot boot its control systems, even if the high-voltage pack is full.

    Conclusion & Next Steps

    Mastering these electric car maintenance basics keeps your EV 12v battery in peak condition, ensuring reliable accessory operation and readiness for every drive. Add a quick 12 V check to your regular service routine—your EV’s sophisticated systems depend on it!

  • How to Prep Your Car for a 1,000-Mile Road Trip

    How to Prep Your Car for a 1,000-Mile Road Trip

    Hook: Planning a cross-country adventure? A thorough road trip car checklist and smart long distance car prep ensure you spend less time stranded on the shoulder and more time enjoying the open road. Follow these steps to make your next 1,000-mile drive smooth and stress-free.

    • Why pre-trip maintenance saves you time and money
    • Easy DIY checks and when to call a pro
    • Essential packing tips for car care on the go

    Why Proper Pre-Trip Prep Matters

    Driving 1,000 miles stretches every component of your vehicle—from engine cooling to tire wear—well beyond daily commute demands. Skipping key inspections can lead to breakdowns, overheating, or unexpected repairs miles from the nearest service station. A comprehensive long distance car prep routine minimizes risk, keeps your fuel economy on track, and gives you peace of mind to focus on the scenery, not the service manual.

    Step-by-Step Road Trip Car Checklist

    1. Inspect Tires & Wheels

    Check tire pressure (including your spare) and adjust to the manufacturer’s recommended PSI. Examine treads for uneven wear or embedded debris, and rotate or replace if tread depth is below 4/32″. Don’t forget to inspect your spare and the jack kit—your road trip car checklist isn’t complete without a usable backup.

    2. Verify Fluid Levels

    Top off engine oil, coolant/antifreeze, brake fluid, power steering fluid, and windshield washer fluid. If oil change is due within the next 1,000 miles, perform it now to keep the engine running clean and cool. For harsh climates, choose coolant with the right freeze/boil-over protection.

    3. Test Battery & Charging System

    Have your battery’s voltage and cranking amps tested—especially if it’s over three years old. Clean corrosion off the terminals, tighten connections, and inspect cables for cracks. A fresh battery or connector repair can prevent a no-start scenario at dawn.

    4. Examine Brakes & Suspension

    Spin each wheel to listen for grinding or rubbing noises. Check brake pad thickness (minimum 3 mm) and look for fluid leaks at calipers. Verify shock and strut mounts for leaks or damage—long-distance comfort and handling depend on a healthy suspension.

    5. Replace Cabin & Engine Air Filters

    A clean air filter keeps fuel economy optimized and cabin air fresh. Swap your engine air filter to maintain proper fuel/air ratio, and install a new cabin air filter to reduce pollen or dust on long hauls.

    6. Inspect Lights & Wipers

    Test headlights (high/low beam), brake lights, turn signals, and hazard lights. Replace any burned-out bulbs. Fit fresh wiper blades and fill washer fluid—rain and highway grime are inevitable on a 1,000-mile journey.

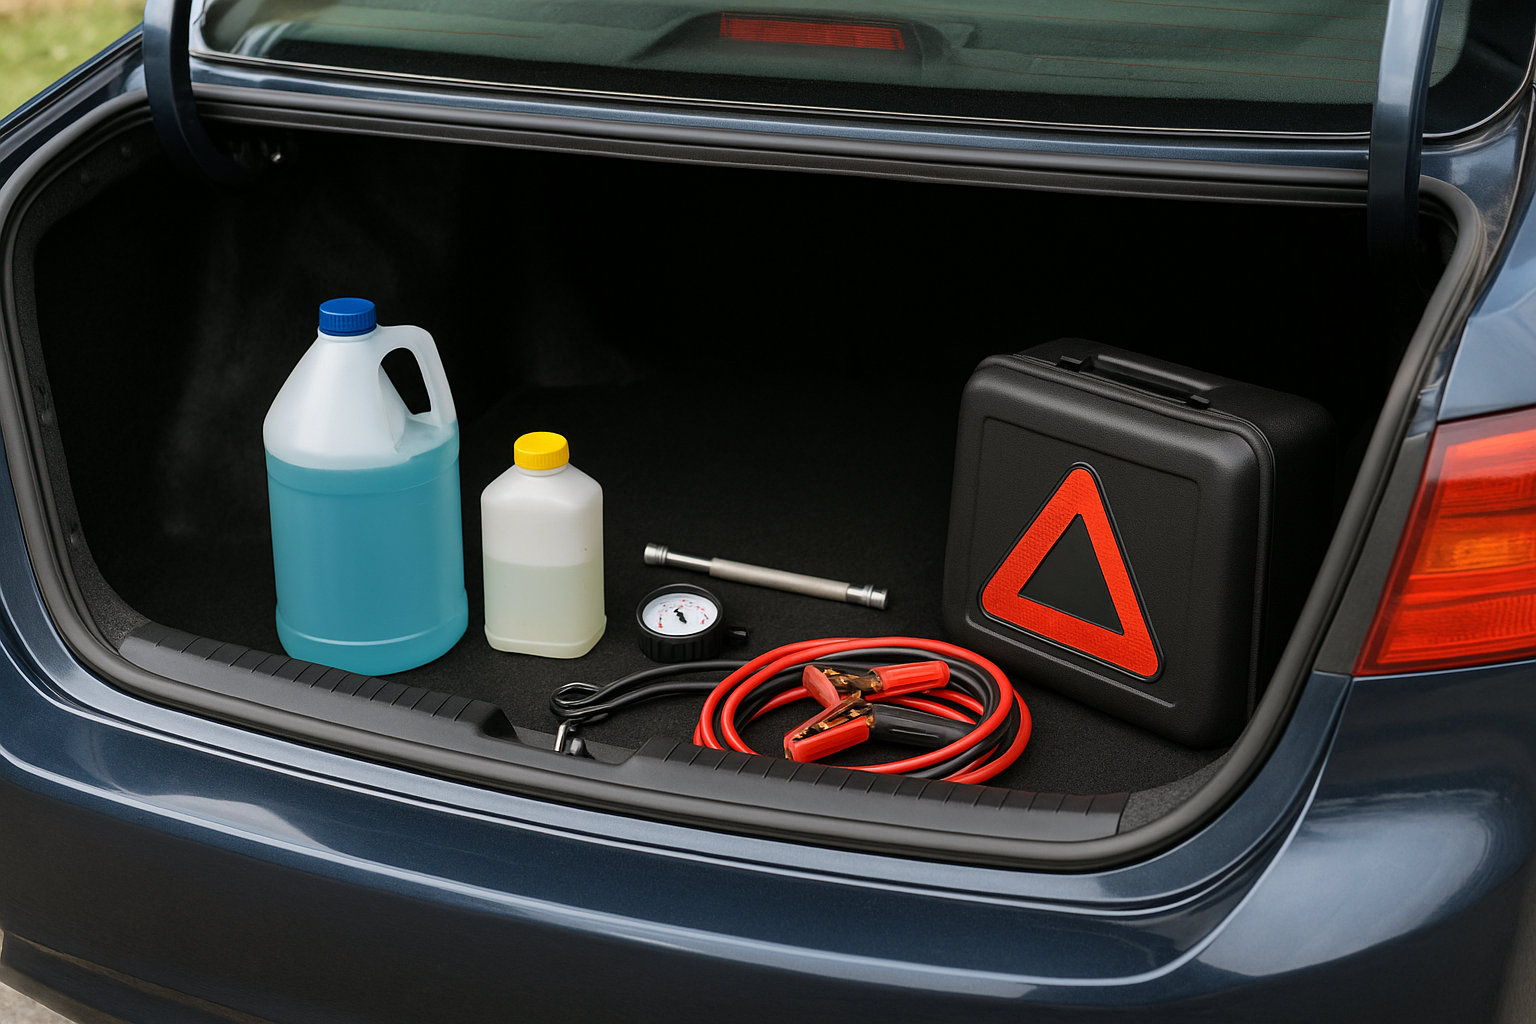
    7. Pack an Emergency Roadside Kit

    Your kit should include jumper cables, a tire pressure gauge, portable air compressor, basic tool set, flashlight with extra batteries, first-aid supplies, and reflective triangles. Add bottled water, non-perishable snacks, and a blanket for unexpected delays.

    Pro Tips & Advanced Tricks

    • Use a digital tire inflator with built-in gauge to quickly top off at gas stops.
    • Apply anti-seize lubricant to battery terminals and lug nuts before departure.
    • Carry a small funnel and extra engine oil/coolant sealed in travel-safe containers.
    • Map service stations and parts stores along your route using your GPS or a road-trip app.

    Common Pitfalls to Avoid

    1. Overlooking belt condition: A worn serpentine belt can snap under heavy load. Inspect for cracks or glazing.
    2. Ignoring warning lights: Don’t clear codes without diagnosing; check-engine lights often signal issues that worsen with mileage.
    3. Packing too much weight: Overloaded cargo stresses brakes, suspension, and tires. Distribute gear evenly and stay within your load limit.

    FAQs

    Q1: How far in advance should I prep my car?
    A1: Perform major checks (fluids, filters, battery) 1–2 weeks before departure, then do a quick walk-around the day before your trip.
    Q2: Can I change brake pads myself before a road trip?
    A2: If you have the right tools and experience, yes—but for safety-critical parts like brakes, consider professional service for peace of mind.
    Q3: What’s the ideal tire pressure for a long drive?
    A3: Use the manufacturer’s placard rating for a fully loaded vehicle. Slightly higher PSI (2–3 PSI) can improve fuel economy and reduce heat buildup.

    Conclusion & Next Steps

    With this road trip car checklist and thorough long distance car prep, you’re set to tackle 1,000 miles confidently. Schedule routine stops every 200–300 miles to recheck your tires and fluid levels. Now pack your bags, queue your playlist, and hit the road—adventure awaits!

  • Top OBD-II Scanners for Home Diagnostics in 2025

    Top OBD-II Scanners for Home Diagnostics in 2025

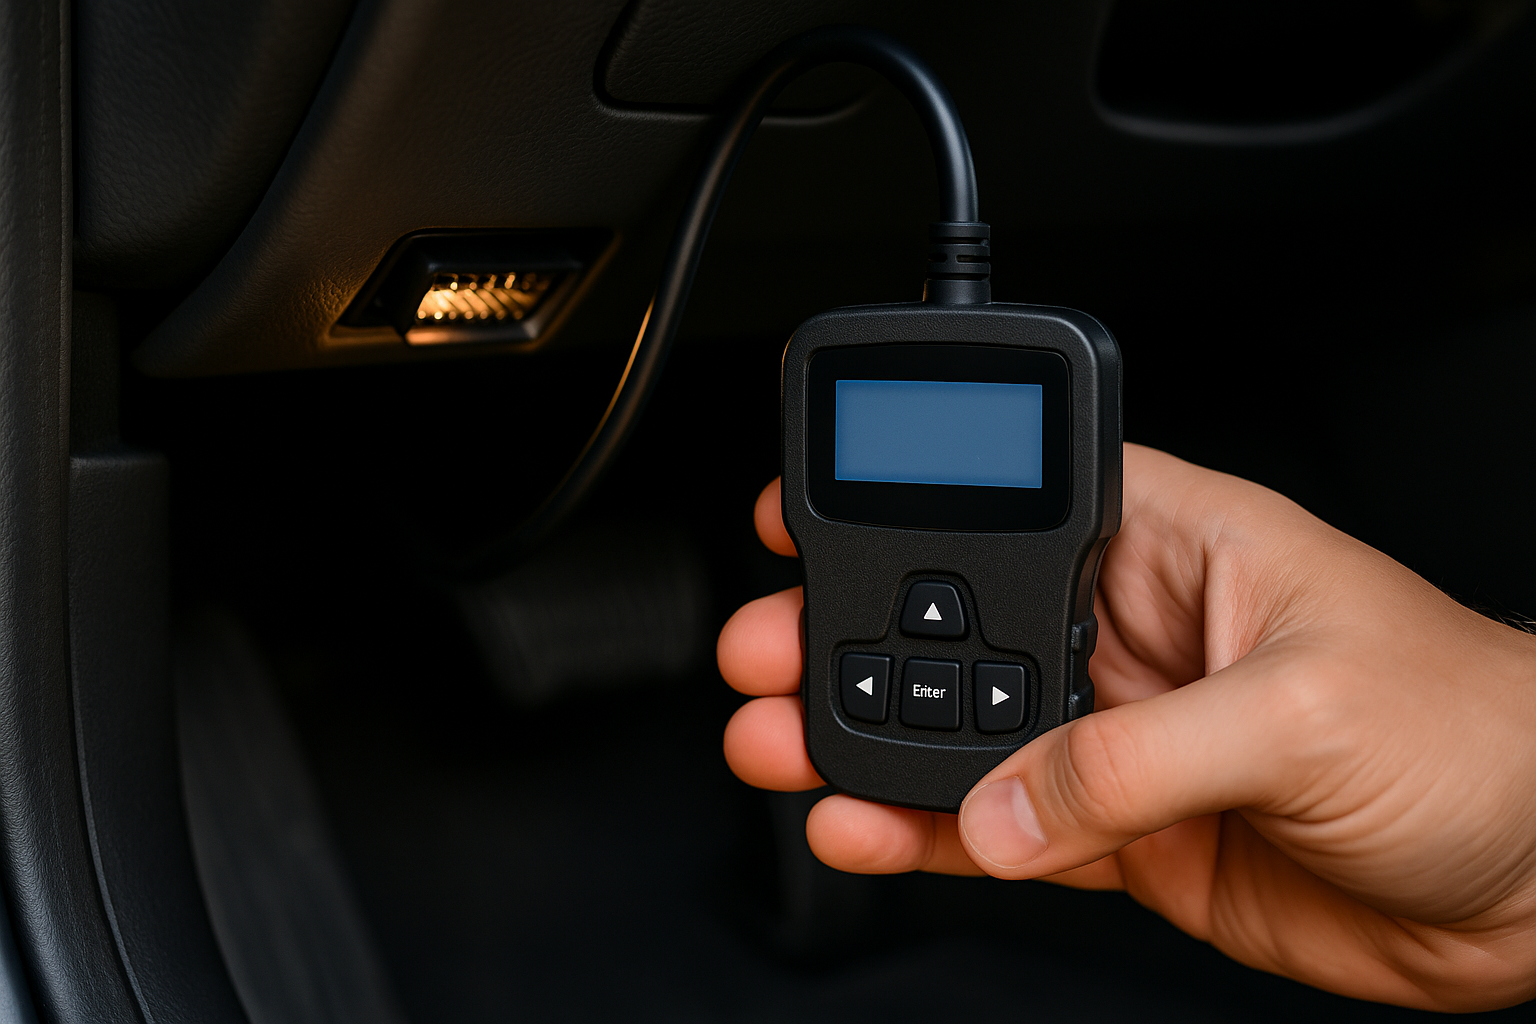
    Hook: Want to troubleshoot your car’s check-engine light without an expensive shop visit? A quality best OBD2 scanner 2025 can read fault codes, clear warnings, and even monitor real-time data. In this roundup of car code reader reviews, we test the top OBD-II scanners for every budget and feature set.

    • Compare professional-grade vs. budget-friendly scanners
    • Learn which devices offer live data, Bluetooth, and advanced diagnostics
    • Find the right tool for your DIY maintenance and peace of mind

    Why You Need an OBD-II Scanner

    Since 1996, all cars and light trucks sold in the U.S. have included an OBD-II port that stores trouble codes when sensors detect faults. Instead of guessing at issues or paying $100+ for a dealer scan, a handheld or Bluetooth-enabled reader lets you:

    • Identify engine, transmission, ABS, and emissions faults
    • View live engine data (RPM, coolant temp, fuel trim)
    • Clear codes after repairs to turn off the check-engine light
    • Monitor performance metrics and detect “pending” issues early

    Our Testing Criteria

    We evaluated scanners based on:

    1. Functionality: Code reading, making sense of PID data, code clearing
    2. Ease of Use: Interface clarity, connectivity (Bluetooth vs. cable)
    3. Compatibility: Coverage of OBD-II protocols, iOS/Android/Windows apps
    4. Additional Features: Freeze-frame data, system tests (EVAP, ABS)
    5. Value: Price vs. feature set and software subscriptions

    Top Picks for 2025

    1. BlueDriver Bluetooth Pro

    The BlueDriver pairs with iOS and Android to deliver dealer-level diagnostics. With live data graphs, freeze-frame viewing, and verified fixes, it tops our list. Its annual subscription unlocks advanced features like ABS and airbag codes.

    • Pros: Professional reports; live data logging; intuitive app
    • Cons: Subscription fee for enhanced modules
    • Price: ~$100 + $25/yr

    2. Autel AutoLink AL619

    A handheld cable scanner that supports OBD-II and EOBD protocols, the AL619 is perfect for those who prefer a dedicated unit. It reads/clears codes for engine, transmission, and more, plus shows live data and smog readiness.

    • Pros: Standalone device; no phone required; two-year warranty
    • Cons: Bulkier than dongle scanners
    • Price: ~$85

    3. FIXD Sensor

    FIXD’s Bluetooth dongle alerts you in plain English when issues arise. Ideal for beginners, the app categorizes severity and offers maintenance reminders. It covers OBD-II emissions and engine codes, but lacks ABS/airbag diagnostics.

    • Pros: User-friendly; unlimited code clears; maintenance tracking
    • Cons: Limited advanced module support
    • Price: ~$60 + optional $70/yr subscription for pro features

    4.ANCEL FX2000

    The FX2000 cable scanner delivers robust diagnostics with one-button I/M readiness tests, oil reset, and live data stream. Its 2.8” color display makes navigating menus a breeze.

    • Pros: Comprehensive system coverage; built-in display; one-year free updates
    • Cons: Firmware updates can be slow
    • Price: ~$50

    5. FIXD Sensor

    FIXD’s Bluetooth dongle alerts you in plain English when issues arise. Ideal for beginners, the app categorizes severity and offers maintenance reminders. It covers OBD-II emissions and engine codes, but lacks ABS/airbag diagnostics.

    5. Autophix V007

    For a true pro-level cable scanner without the dealer price, the Autophix V007 reads codes across all major systems, performs advanced tests, and logs data to PC via USB. It’s a bit more technical but unbeatable for depth.

    • Pros: Full system access; PC-based logging; free software
    • Cons: Steeper learning curve; requires PC or Android device
    • Price: ~$120

    Pro Tips for Getting the Most Out of Your Scanner

    • Update firmware and apps regularly to cover new vehicle models.
    • Clear codes only after fixing the root cause—don’t “reset and forget.”
    • Record freeze-frame data before clearing codes to aid troubleshooting.
    • Compare live data readings against manufacturer specs for accuracy.

    Common Pitfalls to Avoid

    1. Over-reliance on generic code definitions – Always cross-reference P-codes with OEM manuals for precise causes.
    2. Skipping app permissions – Ensure Bluetooth and location services are enabled for reliable connections.
    3. Not securing the dongle – A loose connection can interrupt data flow; use a short extension cable if needed.

    FAQs

    Q1: Which scanner is best for ABS and airbag codes?
    A1: The BlueDriver Pro and Autophix V007 support ABS and airbag diagnostics; FIXD and basic dongles typically do not.
    Q2: Can I use OBD-II scanners on diesel trucks?
    A2: Most scanners support OBD-II diesel protocols; check the manufacturer’s compatibility list for your engine type.
    Q3: Do I need a subscription for advanced features?
    A3: Devices like BlueDriver and FIXD offer free basic functions but require annual subscriptions for enhanced modules.

    Conclusion & Next Steps

    Investing in the best OBD2 scanner 2025 pays dividends in savings and peace of mind. Whether you choose a Bluetooth dongle or dedicated handheld unit, these top picks deliver accurate diagnostics and user-friendly interfaces. Bookmark this guide, pick the scanner that fits your needs, and start decoding those car codes today!

    Resources & Further Reading

  • Seasonal Tire Guide: All-Season vs Snow vs Summer

    Seasonal Tire Guide: All-Season vs Snow vs Summer

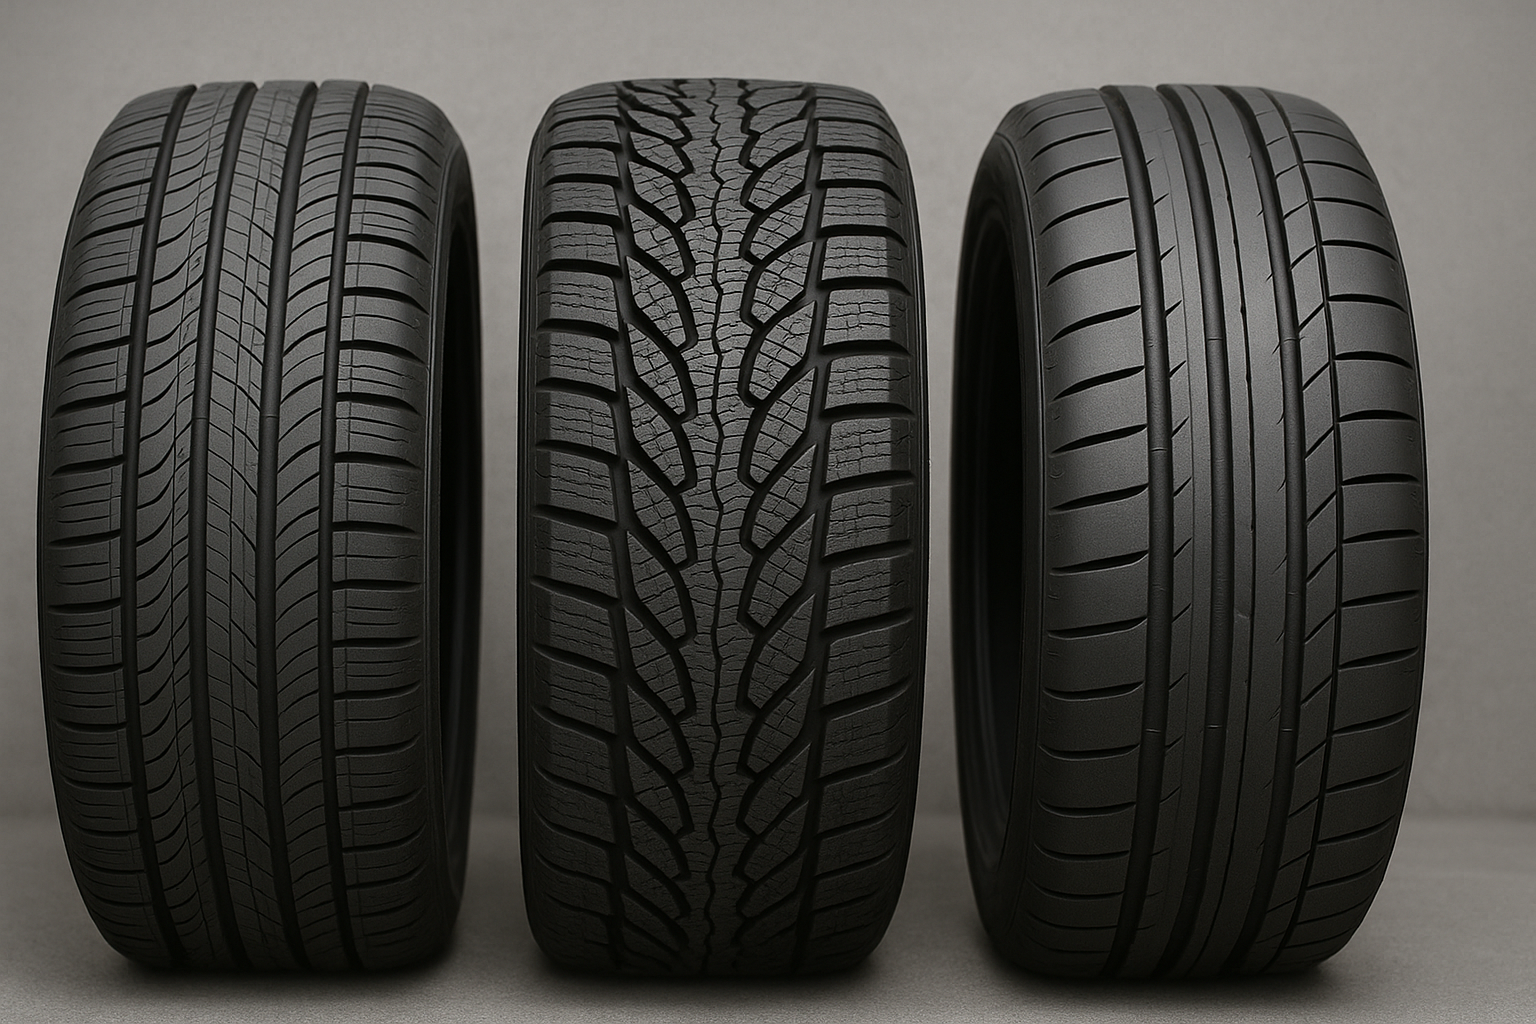
    Hook: Choosing the right tires can mean the difference between confident handling and dangerous slip-and-slides. Whether you live in mild climates or face heavy snow, this tire buying guide will help you decide between all season tires, dedicated snow tires, and performance-focused summer tires.

    • Understand the performance characteristics of each tire type
    • Learn when to switch and why seasonal tires matter for safety
    • Get pro tips for selecting the best tire for your climate and driving style

    Why Seasonal Tires Matter

    Tires are your only contact patch with the road, and the rubber compound and tread design must match the conditions. Using the wrong tire in heat, rain, or snow reduces traction, lengthens braking distances, and accelerates wear. A proper tire buying guide ensures you invest in the right rubber for optimal performance and safety year-round.

    All-Season Tires: The Versatile Compromise

    Performance Profile

    All season tires blend summer-grade tread compounds with shallow siping to handle light winter conditions. You’ll get acceptable wet and dry grip from spring through fall and limited snow performance down to around 20°F (-6°C).

    Pros & Cons

    • Pros: One set year-round; comfortable ride; moderate price
    • Cons: Compromised in heat (softer compound wears faster) and in deep snow/ice

    Snow Tires vs Summer Tires: Head-to-Head

    Snow Tires (Winter Tires)

    Designed with a softer rubber compound and deep, aggressive tread patterns with extensive siping, snow tires maintain flexibility down to -40°F (-40°C). They bite into snow, slush, and ice to deliver far superior traction compared to all-season options.

    • Best Use: Regions with regular snowfalls, ice, and temperatures consistently below 40°F (4°C).
    • Drawbacks: Noisy on dry roads, faster wear in warmth, and reduced cornering grip above 45°F (7°C).

    Summer Tires

    Summer tires feature stiffer compounds and minimal siping, maximizing rubber contact for sharp steering response, shorter braking distances, and high-speed stability in warm, dry, and wet conditions.

    • Best Use: Temperatures above 45°F (7°C), performance driving, rainy summer roads.
    • Drawbacks: Hard and unsafe below 45°F; poor snow and ice traction.

    When to Switch: Temperature & Terrain Guide

    Experts recommend:

    • Install snow tires when average daily temperatures dip below 45°F (7°C).
    • Switch to summer or all-season tires when temperatures stay consistently above 45°F.
    • Use dedicated summer tires for spirited driving or track days—swap back before winter.

    Pro Tips for Smart Tire Purchases

    • Check your vehicle’s tire-size placard or owner’s manual for OEM recommendations.
    • Compare wet/braking/handling ratings from reputable testing agencies (e.g., Tire Rack, Consumer Reports).
    • Factor in cost of mounting, balancing, and storage for your second set of wheels.
    • Inspect and rotate tires every 5,000–7,500 miles to maximize tread life.

    Common Pitfalls to Avoid

    1. Mixing tire types – Never mix snow tires with summer tires on the same axle; it upsets handling balance.
    2. Ignoring alignment – New tires need proper alignment to prevent uneven wear and vibration.
    3. Skipping pressure checks – Seasonal temperature swings change PSI; check monthly.

    FAQs

    Q1: Can I use all-season tires in winter if I drive carefully?
    A1: All-season tires handle light snow, but in heavy winter conditions or ice, dedicated snow tires vastly outperform them.
    Q2: How much sooner do snow tires wear in summer?
    A2: Snow-tire compounds are softer and can lose up to 50% of tread life if used year-round in warm conditions.
    Q3: Are summer tires worth the extra cost?
    A3: For performance drivers or those in consistently warm climates, the enhanced handling and braking can justify the premium.

    Conclusion & Next Steps

    Choosing between all season tires, snow tires, and summer tires comes down to your local climate, driving habits, and safety priorities. Use this tire buying guide to plan seasonal tire swaps, consult professional installers for mounting, and enjoy confident traction year-round. If this guide helped you, share it with fellow drivers or leave your own tire tips below!

    Resources & Further Reading

  • DIY Cabin Air-Filter Swap in Under 10 Minutes

    DIY Cabin Air-Filter Swap in Under 10 Minutes

    Hook: Want fresher air inside your car without spending hours or dollars at the shop? A simple cabin air filter DIY project can be completed in under 10 minutes, improving airflow and reducing allergens. Follow this how to change cabin filter tutorial to keep your HVAC system running smoothly as part of your quick car maintenance routine.

    • Discover why replacing your cabin air filter matters for health and performance
    • Follow our streamlined, step-by-step guide to swap filters in minutes
    • Learn pro tips to extend filter life and common mistakes to avoid

    Why Cabin Air-Filter Replacement Matters

    Your cabin air filter is the first line of defense against dust, pollen, and road debris entering your vehicle’s interior. Over time, a clogged filter restricts airflow, forces your HVAC system to work harder, and can even cause unpleasant odors. Regular cabin air filter DIY not only improves air quality for you and your passengers but also enhances heating and cooling efficiency—saving you money on fuel and reducing wear on blower motors.

    Step-by-Step Guide: DIY Cabin Air-Filter Swap

    1. Locate the Filter Housing

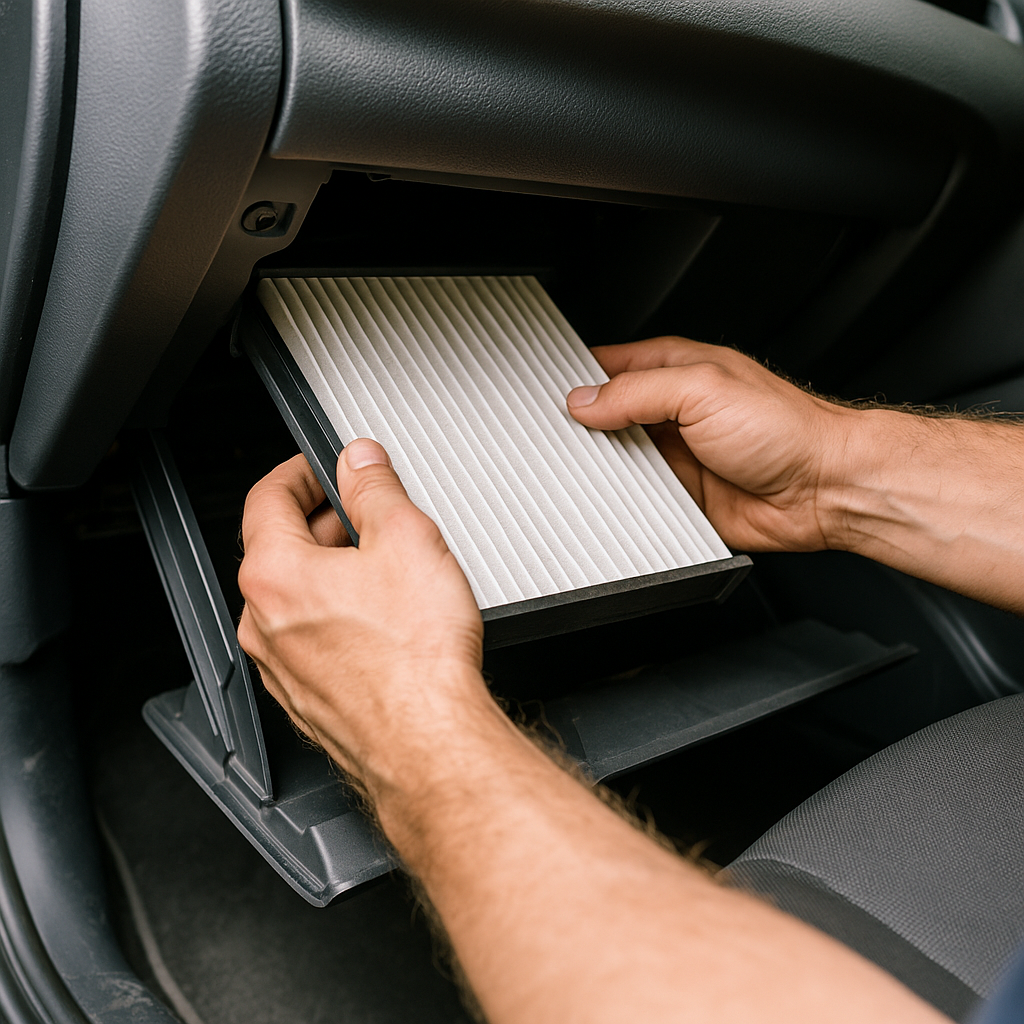
    Most cabin air filters are housed behind the glove box or under the dash. Open the glove box, remove any contents, and gently unhook the dampening arm. Squeeze the glove box sides inward to release the stops and lower it fully. You’ll now see the rectangular filter cover.

    2. Remove the Old Filter

    Use a flat-head screwdriver or your fingers to unclip the filter cover. Slide out the dirty filter, taking note of the airflow arrow printed on its frame. Inspect the old filter: if it’s dark, crusty, or loaded with debris, it’s definitely due for replacement.

    3. Install the New Cabin Air Filter

    Grab your replacement filter and align it so the airflow arrow matches the direction indicated on the housing. Gently slide it into place, ensuring the edges seat flush against the frame. Avoid forcing the filter, which can damage the pleats or housing.

    4. Reassemble and Test

    Snap the filter cover back into its clips, lift the glove box back into position, and reattach the dampening arm. Close the glove box, start your engine, and run the blower on high to confirm strong, unobstructed airflow. Congratulations—you’ve completed a quick car maintenance task in record time!

    Pro Tips & Advanced Tricks

    • Choose a high-quality HEPA-style filter for superior particle capture
    • Keep a spare filter in your glove box to swap out seasonally or after dusty trips
    • Use a handheld vacuum to clean the housing before installing the new filter
    • Mark your dashboard or maintenance app with the date and mileage for your next swap

    Common Pitfalls to Avoid

    1. Wrong filter orientation – Installing with the arrow facing inward can reduce airflow and stress the blower motor.
    2. Neglecting the housing seal – Ensure the cover clips fully engage to prevent unfiltered air bypass.
    3. Skipping pre-clean – Debris left in the housing can damage the new filter or lead to rattles.

    FAQs

    Q1: How often should I change my cabin air filter?
    A1: Most manufacturers recommend replacing every 12,000–15,000 miles or at least once per year, but check your owner’s manual for specific how to change cabin filter intervals.
    Q2: Can I perform this swap outdoors?
    A2: Yes—just park on level ground, keep your doors closed to minimize dust, and follow the same steps for a smooth cabin air filter DIY experience.
    Q3: What are the signs of a clogged cabin filter?
    A3: Reduced airflow, musty or stale odors, increased dust inside the cabin, and louder blower noise all indicate it’s time for a swap.

    Conclusion & Next Steps

    Performing a cabin air filter DIY in under 10 minutes is an easy way to enhance air quality and maintain your car’s HVAC efficiency. Add this simple task to your biannual maintenance checklist and enjoy cleaner, fresher interior air year-round. If you found this guide helpful, share it with fellow drivers or leave your own quick car maintenance tips in the comments!

    Resources & Further Reading

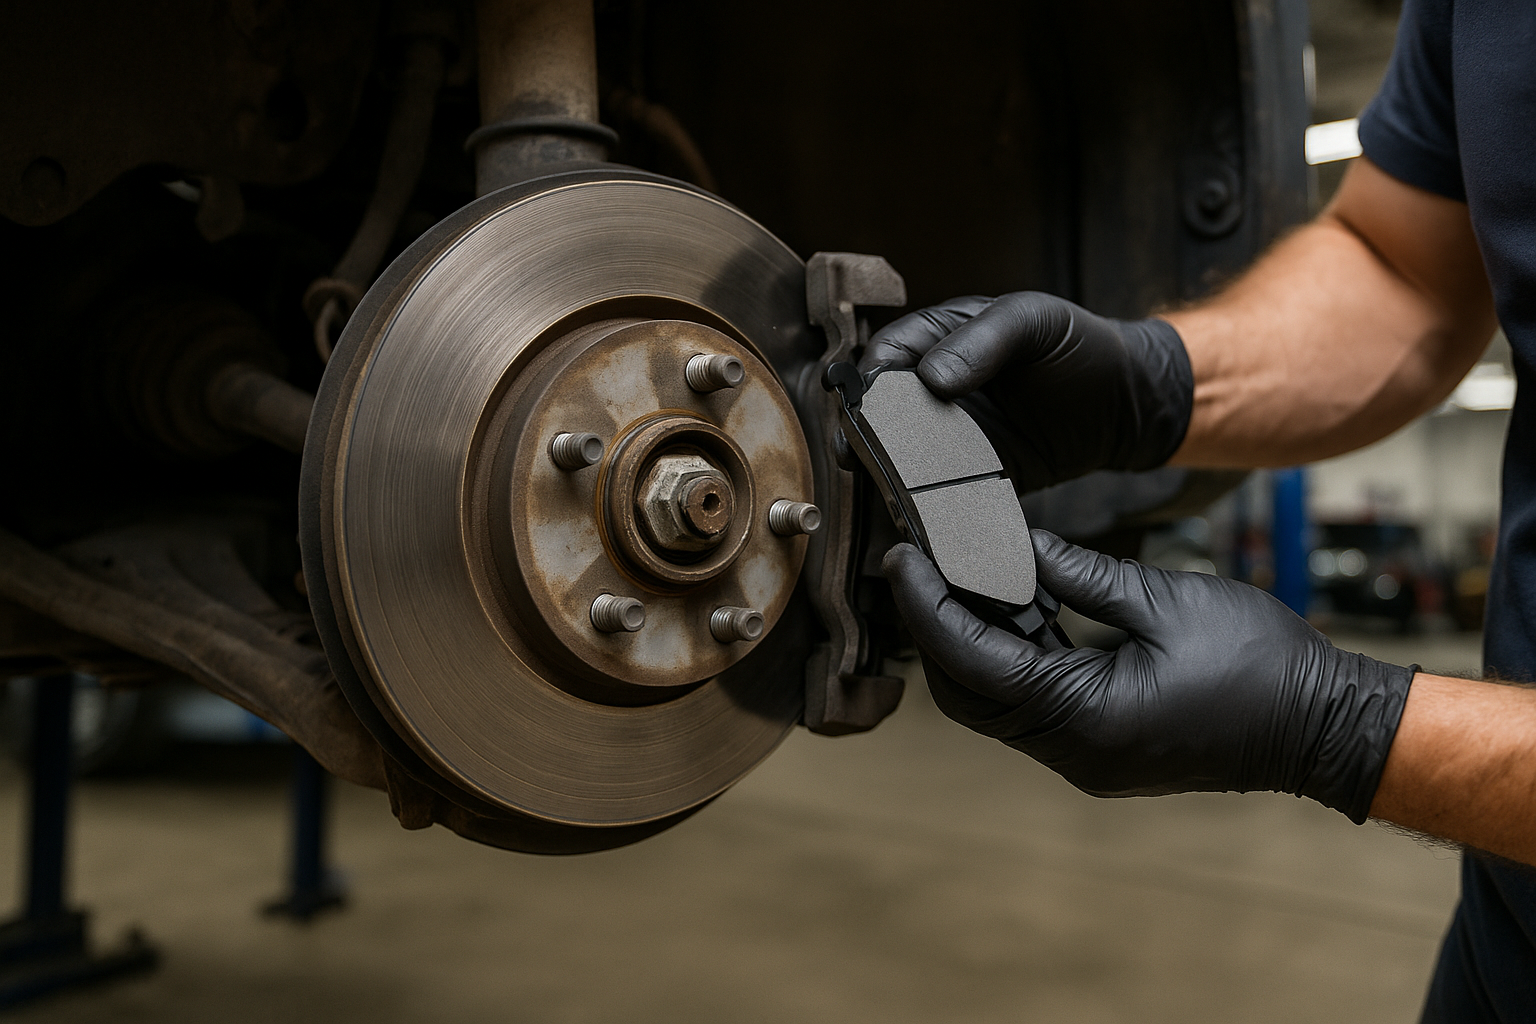
  • Brake Pad Replacement Costs by Model Year (2020-2025)

    Brake Pad Replacement Costs by Model Year (2020-2025)

    Hook: Wondering how much you’ll pay to replace worn brake pads? Understanding brake pad cost variations across different model years can help you budget smartly and avoid surprises. In this replace brakes guide, we compare costs for popular models from 2020 through 2025.

    • Overview of factors that drive brake pad prices
    • Cost breakdown by model year and vehicle segment
    • Pro tips to save on service without sacrificing safety

    Why Brake Pad Costs Vary

    Brake pad prices depend on pad material, vehicle weight, rotor size, and whether your car uses standard, performance, or ceramic pads. Luxury and performance models often require premium compounds with higher friction ratings, driving up brake pad cost. Always check your owner’s manual for the OEM specification and consult your mechanic before choosing aftermarket alternatives.

    Cost Comparison by Model Year & Vehicle Type

    2020–2021 Compact & Midsize Sedans

    For economy sedans like the Toyota Corolla and Honda Civic, expect to pay $100–$150 per axle for standard semi-metallic pads, including labor. Ceramic options add about $30–50 extra for cleaner operation and longer life.

    2020–2021 SUVs & Crossovers

    Popular crossovers such as the Ford Escape and RAV4 use larger rotors, raising costs to $150–$200 per axle. Premium ceramic kits can push total price to $230–$280.

    2022–2023 Sports & Performance Cars

    Vehicles like the Subaru WRX and Ford Mustang GT often require high-performance pads rated for higher temperatures. Expect brake pad cost of $250–$350 per axle for semi-metallic, or $350–$450 for ceramic or carbon-enhanced options.

    2024–2025 Electric Vehicles & Hybrids

    EVs and hybrids (e.g., Tesla Model 3, Prius) use regenerative braking to preserve pads longer. You may only need replacement every 50,000–70,000 miles. When service is due, brake pad kits run $120–$180 per axle, labor included, thanks to smaller friction loads.

    Cost Summary Table

    Year & Segment Standard Pads Ceramic / Performance Pads
    2020–21 Compact Sedans $100–$150 $130–$200
    2020–21 SUVs/Crossovers $150–$200 $180–$280
    2022–23 Performance Cars $250–$350 $350–$450
    2024–25 EVs & Hybrids $120–$180 $150–$230

    Pro Tips to Reduce Your Brake Service Bill

    • Shop around: Compare quotes from independent shops, dealerships, and mobile mechanics.
    • Buy pads yourself: Purchasing high-quality aftermarket pads online can save 20–30% over shop-supplied parts.
    • Combine services: Bundle pad replacement with other brake work (rotor resurfacing, fluid flush) to get package discounts.
    • Use coupon sites: Many chains offer online coupons for brake service—check local promotions.

    Common Pitfalls to Avoid

    1. Ignoring pad wear sensors – Waiting until the sensor triggers can damage rotors, increasing repair cost.
    2. Choosing the cheapest pads – Low-quality pads wear faster and can produce dust or noise, costing more in the long run.
    3. Skipping rotor inspection – Worn or warped rotors can ruin new pads; have rotors measured and resurfaced or replaced as needed.

    FAQs

    Q1: How long do brake pads usually last?
    A1: Most drivers replace pads every 30,000–50,000 miles, but driving style, pad material, and vehicle weight all affect lifespan.
    Q2: Can I replace brake pads myself?
    A2: If you’re comfortable with basic tools and follow torque specs, DIY replacement is possible—but always follow a replace brakes guide specific to your model.
    Q3: Do ceramic pads cost more to maintain?
    A3: Ceramic pads cost more upfront but produce less dust and last longer, often offsetting higher initial expense over time.

    Conclusion & Next Steps

    Brake pad costs vary widely based on your vehicle’s model year, segment, and pad material. Use this car model comparison to budget accurately and plan service intervals. Bookmark this guide, and when you’re ready, request quotes from multiple shops or order quality pads online to save.

    Resources & Further Reading

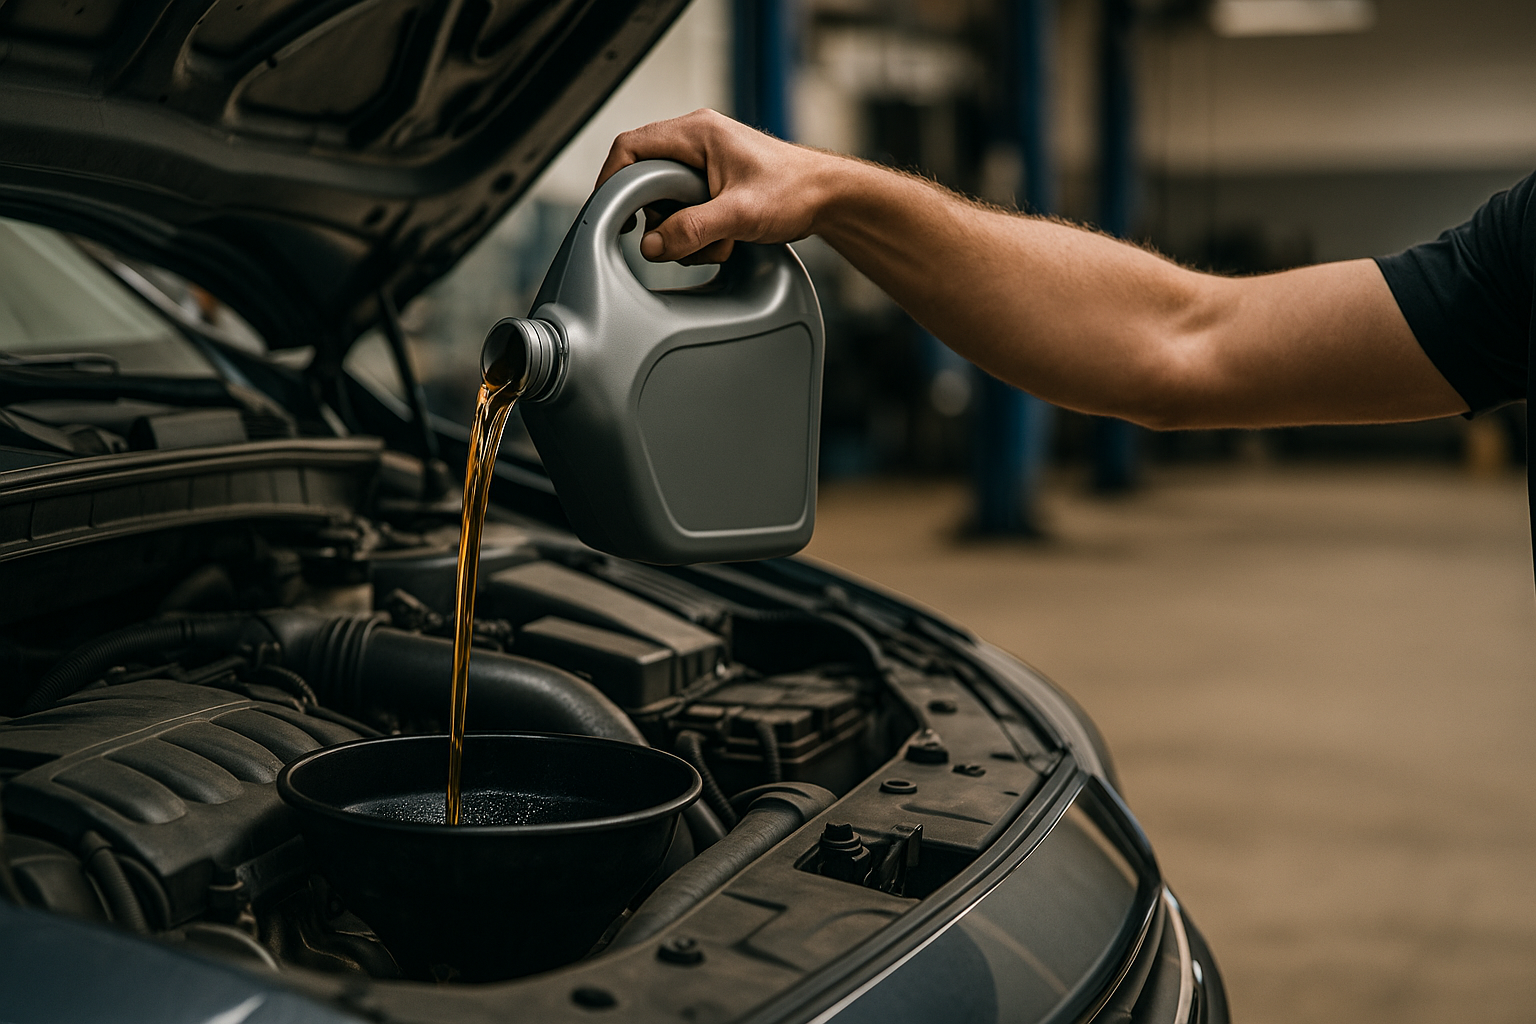
  • The Complete Oil-Change Schedule: Gas, Hybrid, and EV Compared

    The Complete Oil-Change Schedule: Gas, Hybrid, and EV Compared

    Hook: Not sure when to change your oil? An optimized oil change schedule can save you time, money, and engine headaches—whether you’re driving a traditional gas car, a hybrid, or a modern EV. In this guide, we break down the intervals and best practices for each powertrain.

    • Understand why oil changes matter for gas, hybrid, and EV maintenance
    • Get recommended interval charts for each vehicle type
    • Discover pro tips to extend oil life and avoid common mistakes

    Why Oil Changes Matter for Every Vehicle

    Oil is the lifeblood of combustion engines and hybrids, lubricating moving parts, reducing friction, and carrying away heat and contaminants. While pure electric vehicles (EVs) don’t use engine oil, many still rely on lubricants for transmission and auxiliary systems—making EV maintenance important, too. Skipping scheduled changes can lead to sludge build-up, reduced fuel economy, and costly repairs.

    Oil Change Intervals: Gas vs. Hybrid vs. EV

    1. Gasoline Vehicles

    Most modern gas cars recommend an oil change schedule of 5,000–7,500 miles or every 6 months, whichever comes first. High-performance or turbocharged engines may require changes closer to 5,000 miles. Always consult your owner’s manual and monitor oil quality indicators if your car supports an oil-life monitoring system.

    2. Hybrid Vehicles

    Hybrids combine a gas engine with electric assistance—so they still need regular oil service. However, because the engine often shuts off at idle and runs less overall, many hybrids extend to 7,500–10,000 miles between changes. That longer hybrid oil interval reduces service costs without compromising protection. Still, check for severe-duty scenarios (towing, extreme climates) and adjust intervals accordingly.

    3. Electric Vehicles

    Pure EVs have no engine oil, but they do have gearboxes, coolant, and regenerative-brake fluids. A common recommendation is to inspect and top-off transmission fluid every 30,000–50,000 miles, depending on manufacturer guidelines. While EVs largely eliminate oil-change hassles, incorporating these checks into your EV maintenance routine ensures smooth operation and warranty compliance.

    Pro Tips & Advanced Tricks

    • Use high-quality synthetic oil: It flows better at low temps and resists breakdown under heat.
    • Track mileage with a maintenance app: Get alerts before your next service is due.
    • Inspect oil filters and gaskets: A worn seal can cause leaks—even between scheduled changes.

    Common Pitfalls to Avoid

    1. Over-changing oil – Unnecessary early changes waste money and generate excess waste oil. Stick to manufacturer intervals.
    2. Using the wrong oil viscosity – Check the owner’s manual for correct grade; wrong viscosity can harm engine performance.
    3. Neglecting EV fluids – Some EV owners skip transmission-fluid checks, but low fluid can damage gearboxes over time.

    FAQs

    Q1: Can I go longer than 10,000 miles on a hybrid oil change?
    A1: Only if your hybrid’s owner manual explicitly allows it and you use top-tier synthetic oil—otherwise stick to 7,500–10,000 miles.
    Q2: Do EVs ever need engine oil?
    A2: No engine oil, but check transmission and brake-system fluids as part of your regular EV maintenance.
    Q3: How do I know when my oil is dirty?
    A3: Dark, gritty oil on your dipstick or low oil-life readings on modern dashboards signal it’s time for a change.

    Conclusion & Next Steps

    Sticking to a proper oil change schedule is key to engine longevity and peak performance—whether you drive gas, hybrid, or an EV. Bookmark this guide and set calendar reminders for your next service. If you found this helpful, leave a comment below or sh